16. Roles and permissions
16.1 How roles work
Section titled “16.1 How roles work”Each member of a provider has one role. The role says what the person can see and change. The role you set first is the base role, and it applies to every project of that provider. To give one person different rights on some projects, set a role per project on top of it.
A provider has exactly one main administrator (ผู้ดูแลหลัก). The person who creates the provider starts as that administrator.
16.2 The eight roles
Section titled “16.2 The eight roles”The roles run from most rights to fewest. The names below match the screen.
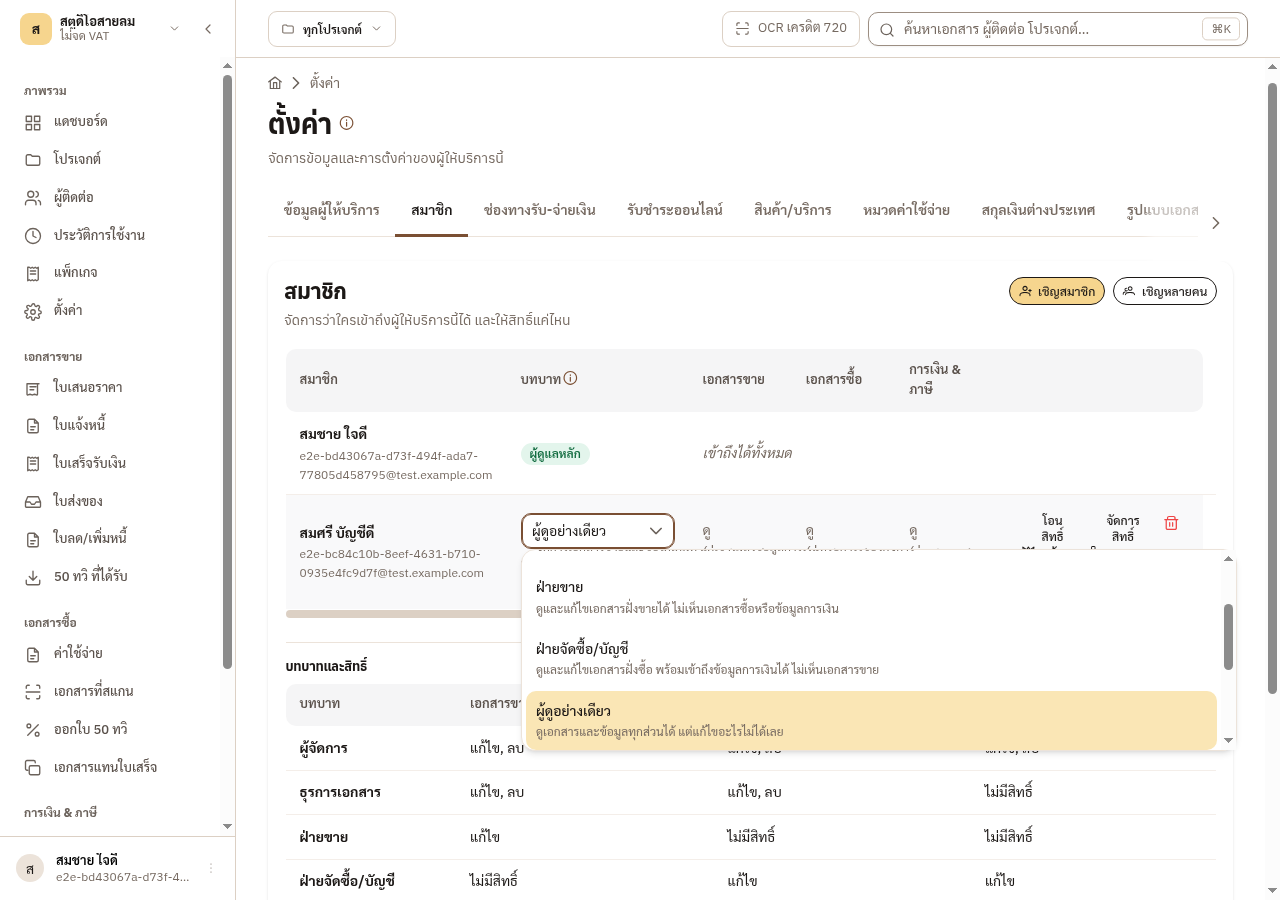
- ผู้จัดการ (manager): full rights. Manages sales and purchase documents and finance, deletes documents, invites and manages members, creates projects, closes periods, and locks and unlocks documents.
- ธุรการเอกสาร (document clerk): full control of sales and purchase documents, but no finance or profit data.
- ฝ่ายขาย (sales): views and edits sales documents. No purchase documents, no finance data.
- ฝ่ายจัดซื้อ/บัญชี (purchasing/accounts): views and edits purchase documents and can reach finance data. No sales documents.
- ผู้ดูอย่างเดียว (viewer): sees every area, changes nothing.
- ผู้สอบบัญชี (auditor): sees issued sales and purchase documents only, no drafts, and can view finance data. An auditor can also lock documents and unlock them. It suits an accountant or an outside reviewer.
- ลูกค้า (customer): sees issued sales documents only, such as invoices. Nothing else of the business.
- ไม่มีสิทธิ์ (no access): sees nothing of this provider yet. You can still open some projects to the person later.
16.3 Invite a member
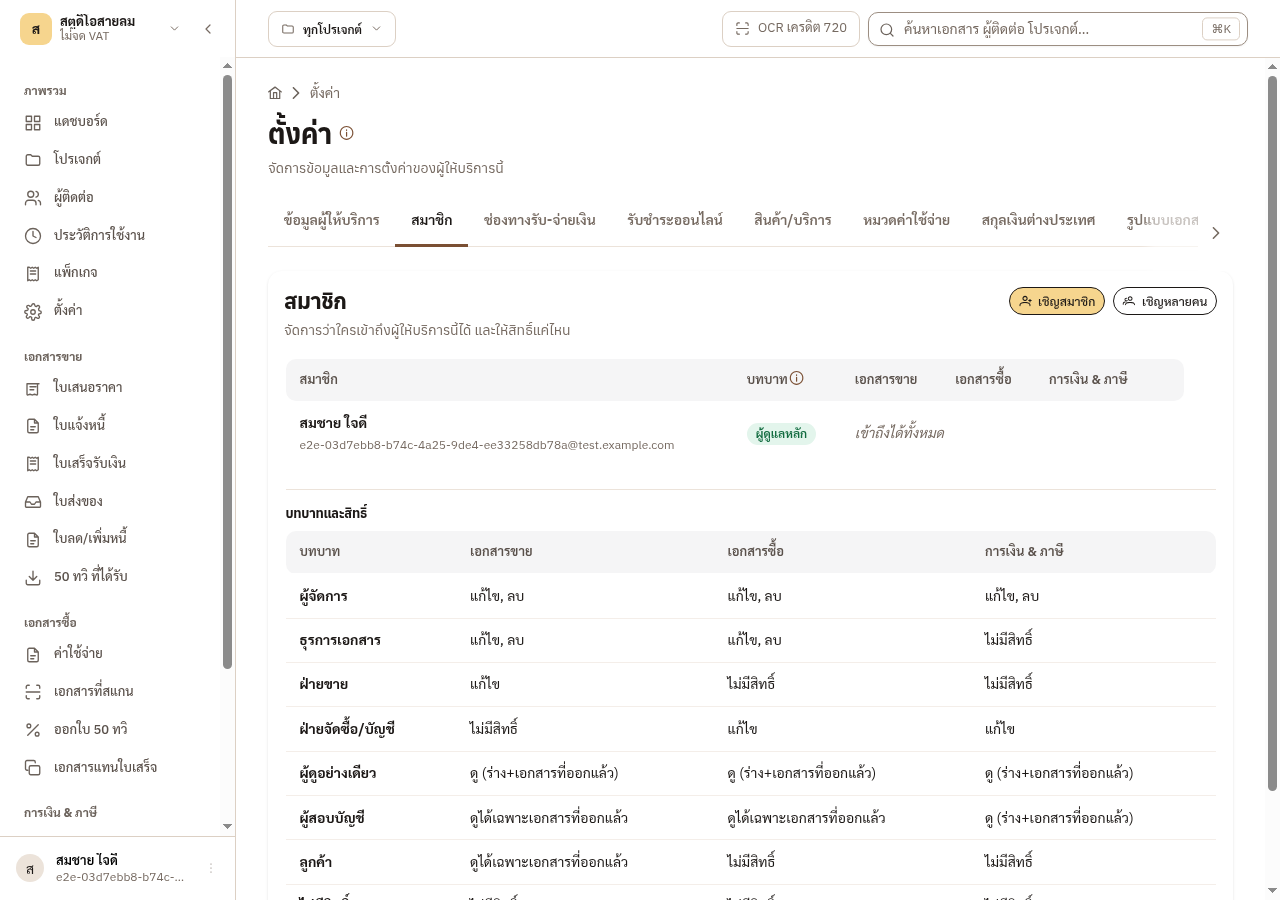
Section titled “16.3 Invite a member”The main administrator and managers can invite members. Open ตั้งค่า and go to the members tab.
-
Press เชิญสมาชิก.
-
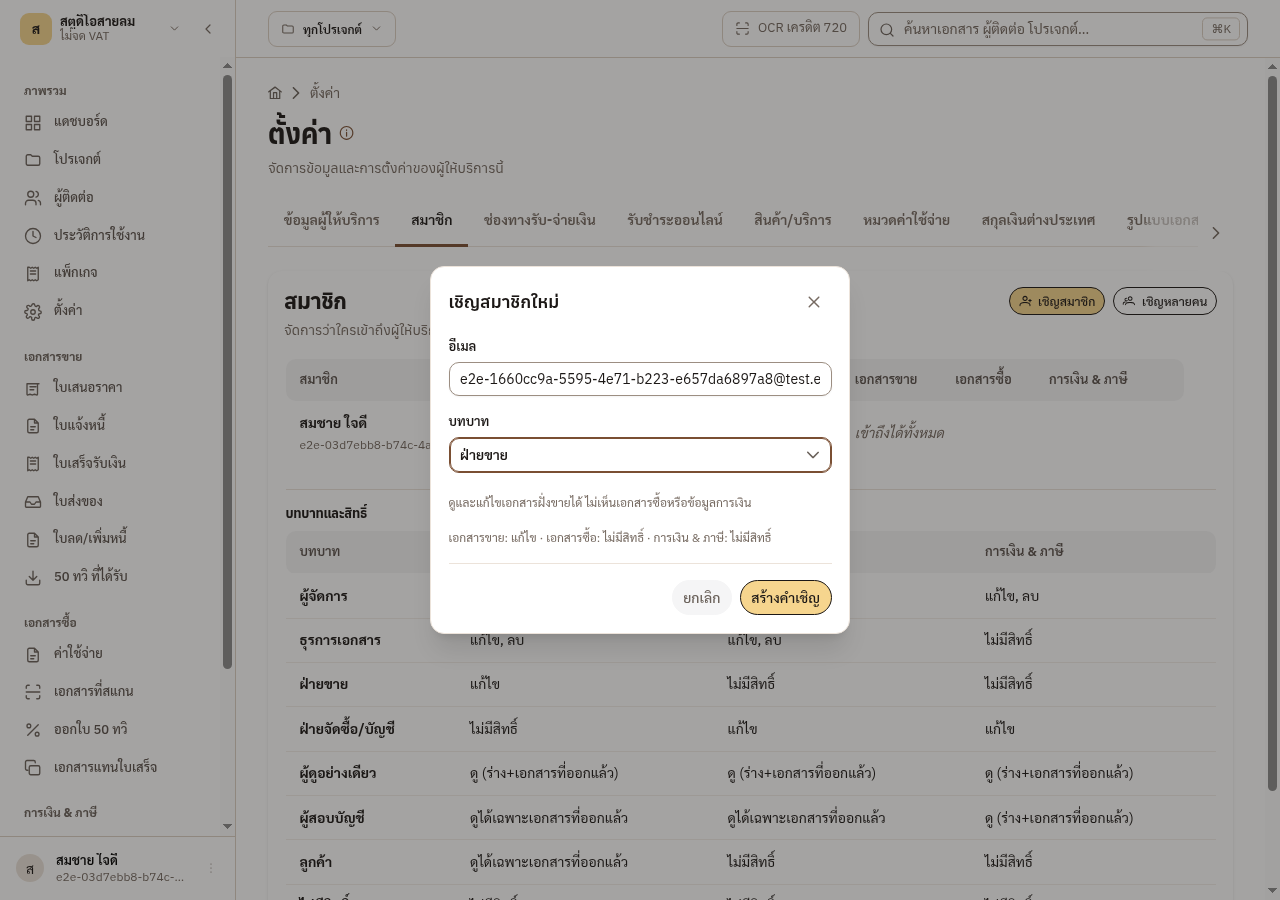
Fill the อีเมล and choose the บทบาท. The choice starts at ไม่มีสิทธิ์, so pick a role yourself. The screen sums up the level of sales, purchase and finance access that role gives.
-
Press สร้างคำเชิญ.
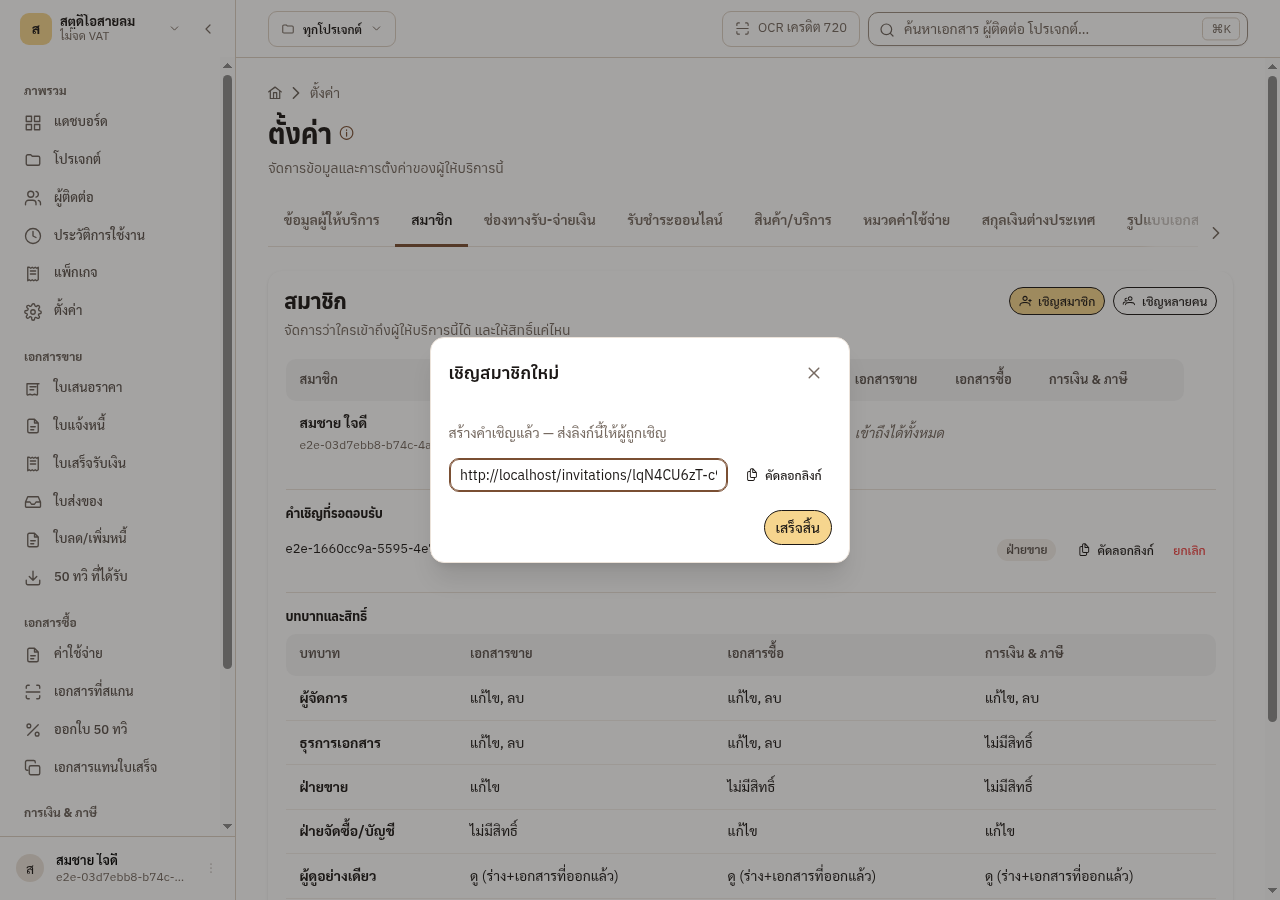
→ You should see: EZer emails the invitation and also shows a link you can copy and send yourself. The invitation is valid for 14 days.
-
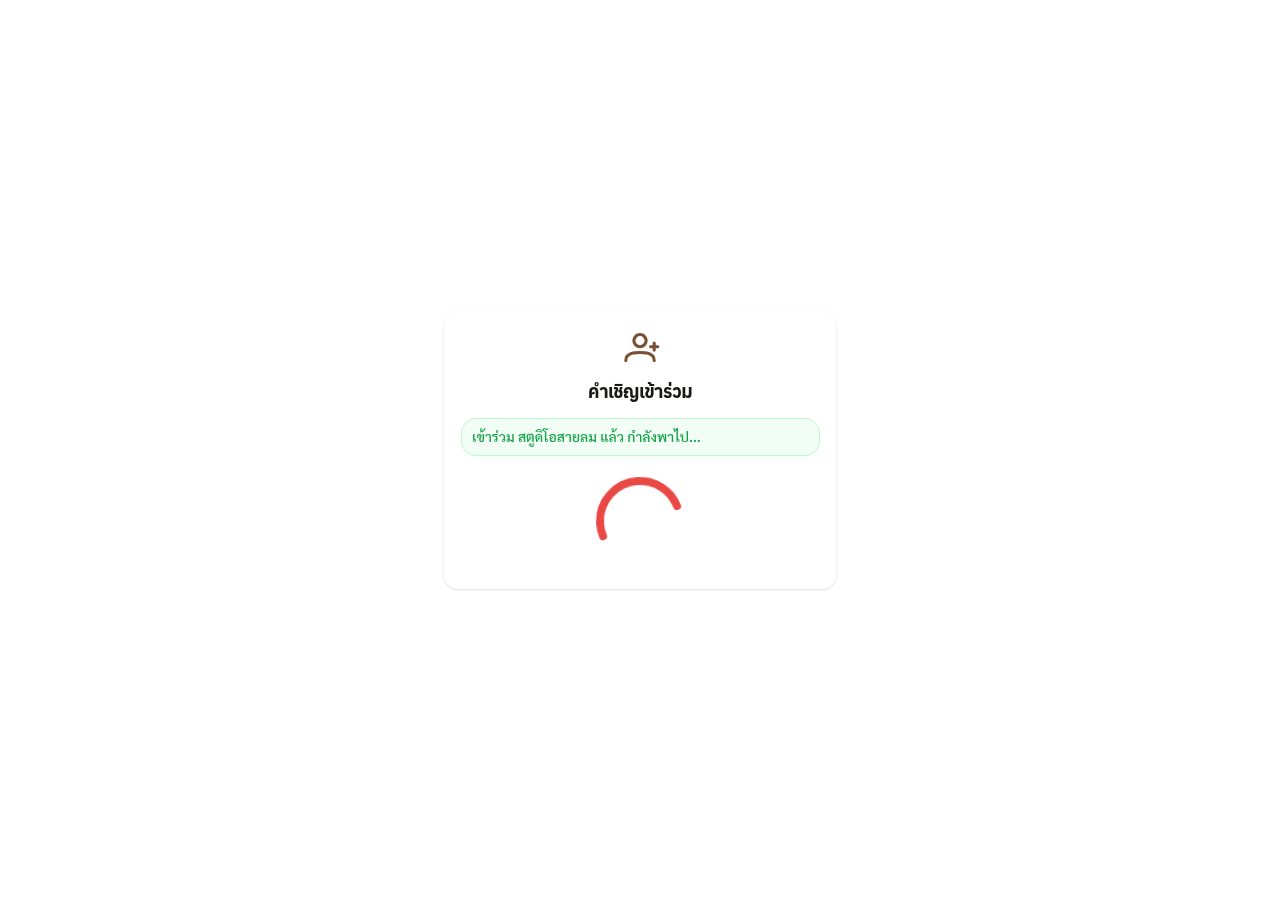
The invitee opens the link, presses รับคำเชิญ, and sees a message that they have joined.
-
The invitee appears in the member list.
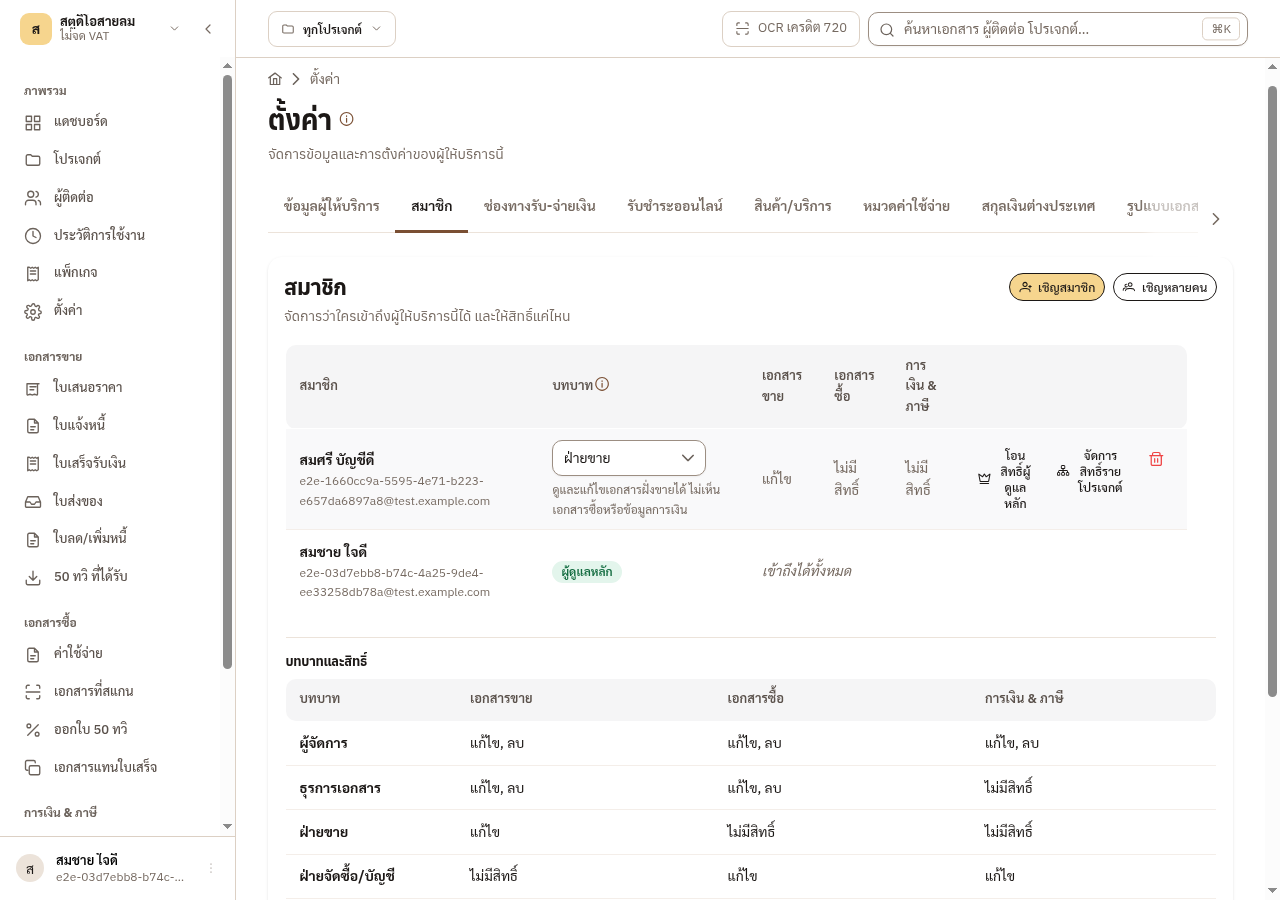
Invitations nobody has accepted sit under คำเชิญที่รอตอบรับ. Press คัดลอกลิงก์ to send the link yourself, or ยกเลิก. If the email failed, the row shows ส่งอีเมลไม่สำเร็จ and a ส่งอีกครั้ง button. A cancelled link stops working. To invite several people with one role, press เชิญหลายคน and paste the emails separated by new lines, spaces or commas. EZer skips people who are already members, have a pending invitation, or appear twice.
16.4 Change a role and set a role per project
Section titled “16.4 Change a role and set a role per project”-
In the member’s row, open the role field to see each role with its description.
-
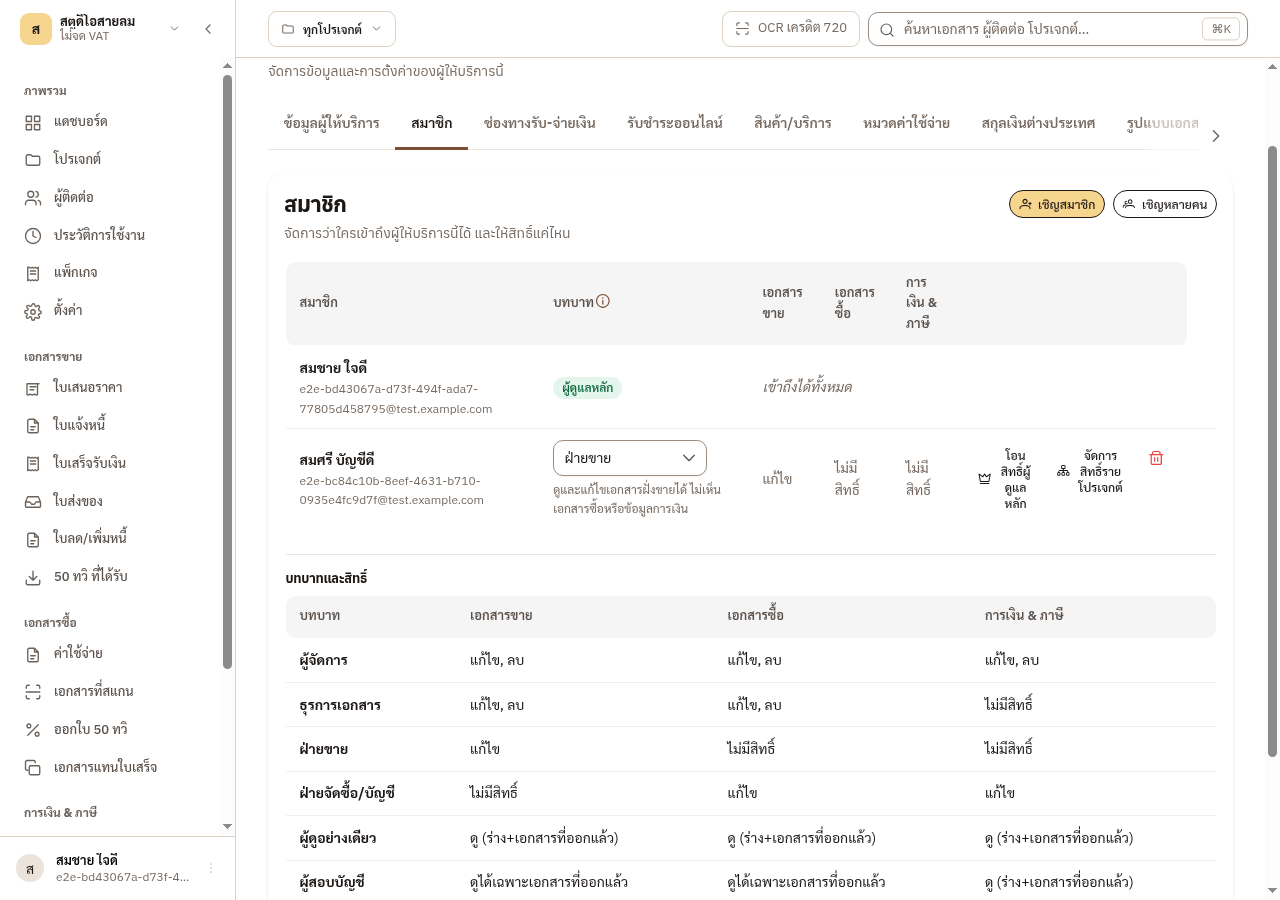
Pick the new role. EZer saves at once. There is no save button.
-
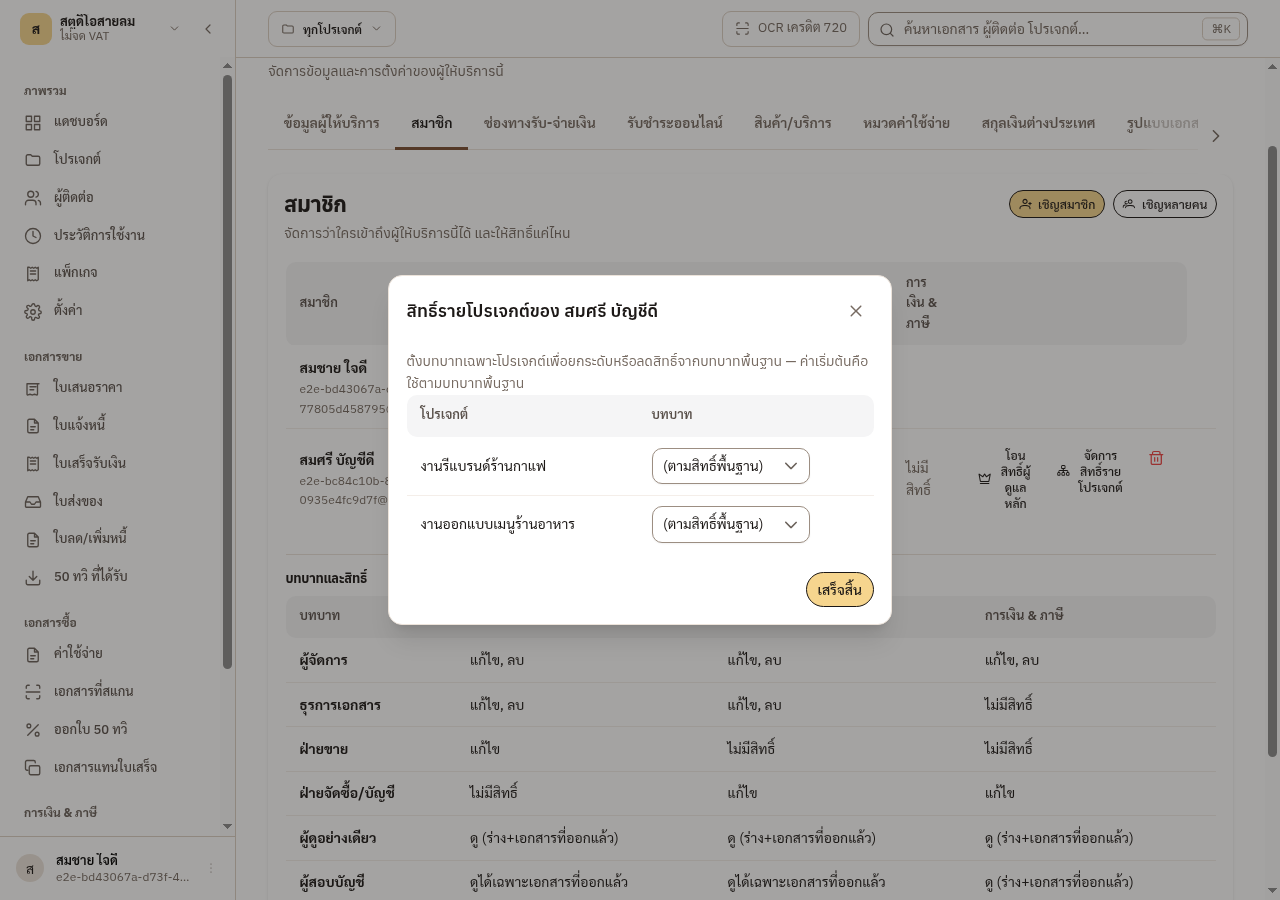
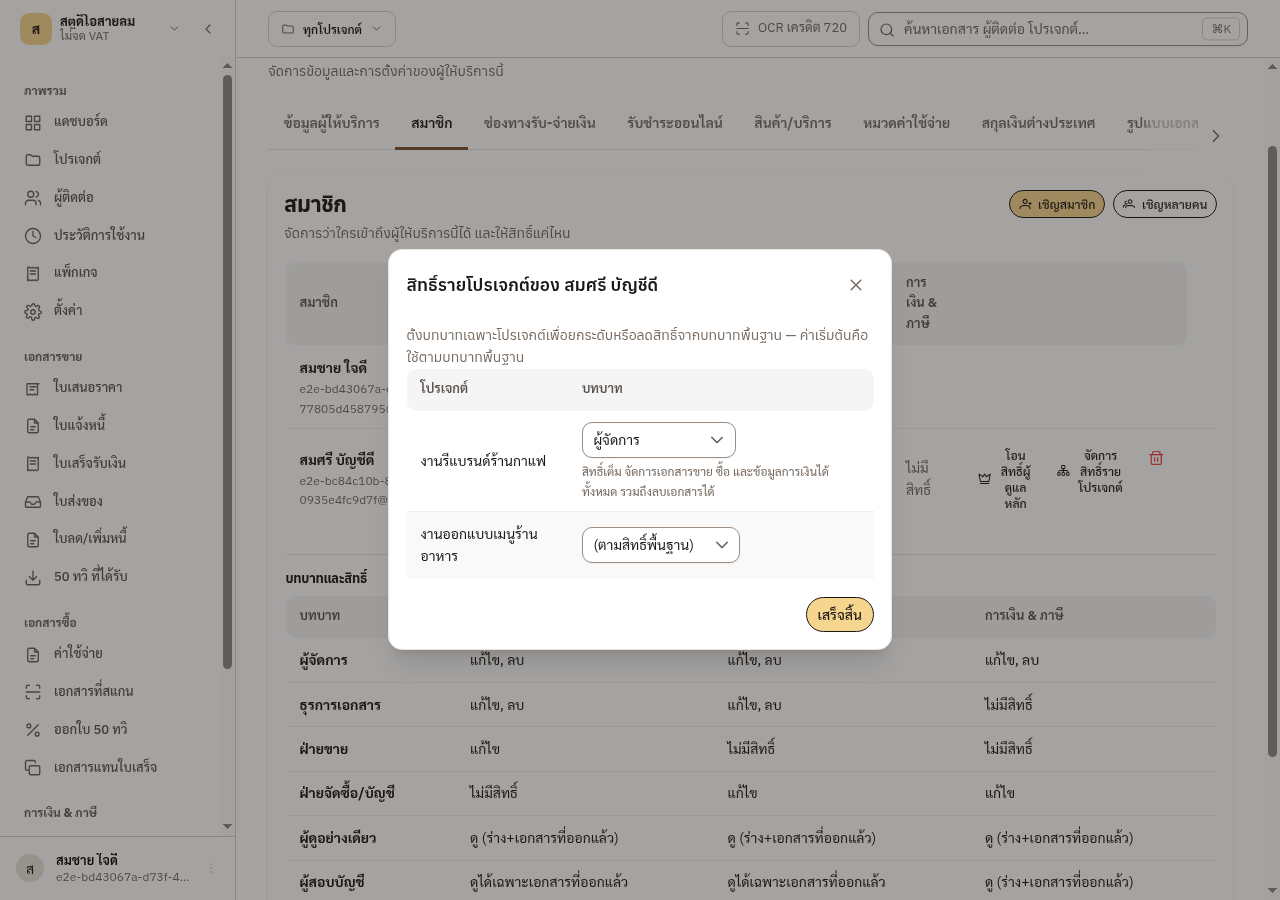
Press จัดการสิทธิ์รายโปรเจกต์. Each project starts at (ตามสิทธิ์พื้นฐาน), which means it follows the base role.
-
Choose the role for the project you want. EZer saves each row as you go. Press เสร็จสิ้น when you are done.
What a role per project can change
Section titled “What a role per project can change”- A role per project changes only access to the sales and purchase documents of that project. It can raise or lower rights, for example a manager set to ไม่มีสิทธิ์ on a confidential project.
- Finance, locking, unlocking, closing periods and administration always follow the base role. Someone who is a manager on one project only is not an administrator.
- ธุรการเอกสาร cannot be set as a role per project.
- An auditor who has to lock documents or unlock them needs ผู้สอบบัญชี as the base role. Set only per project, the person reads that project’s issued documents but cannot lock or unlock.
16.5 Remove a member
Section titled “16.5 Remove a member”Press the bin button นำออก in the member’s row and confirm. EZer records who removed whom. The main administrator cannot be removed. Hand the role over first.
16.6 Hand over the main administrator role
Section titled “16.6 Hand over the main administrator role”The main administrator cannot leave the role and cannot lower their own rights. To step back, hand the role to another member. Only the main administrator can do this, and only the main administrator can deactivate the provider.
-
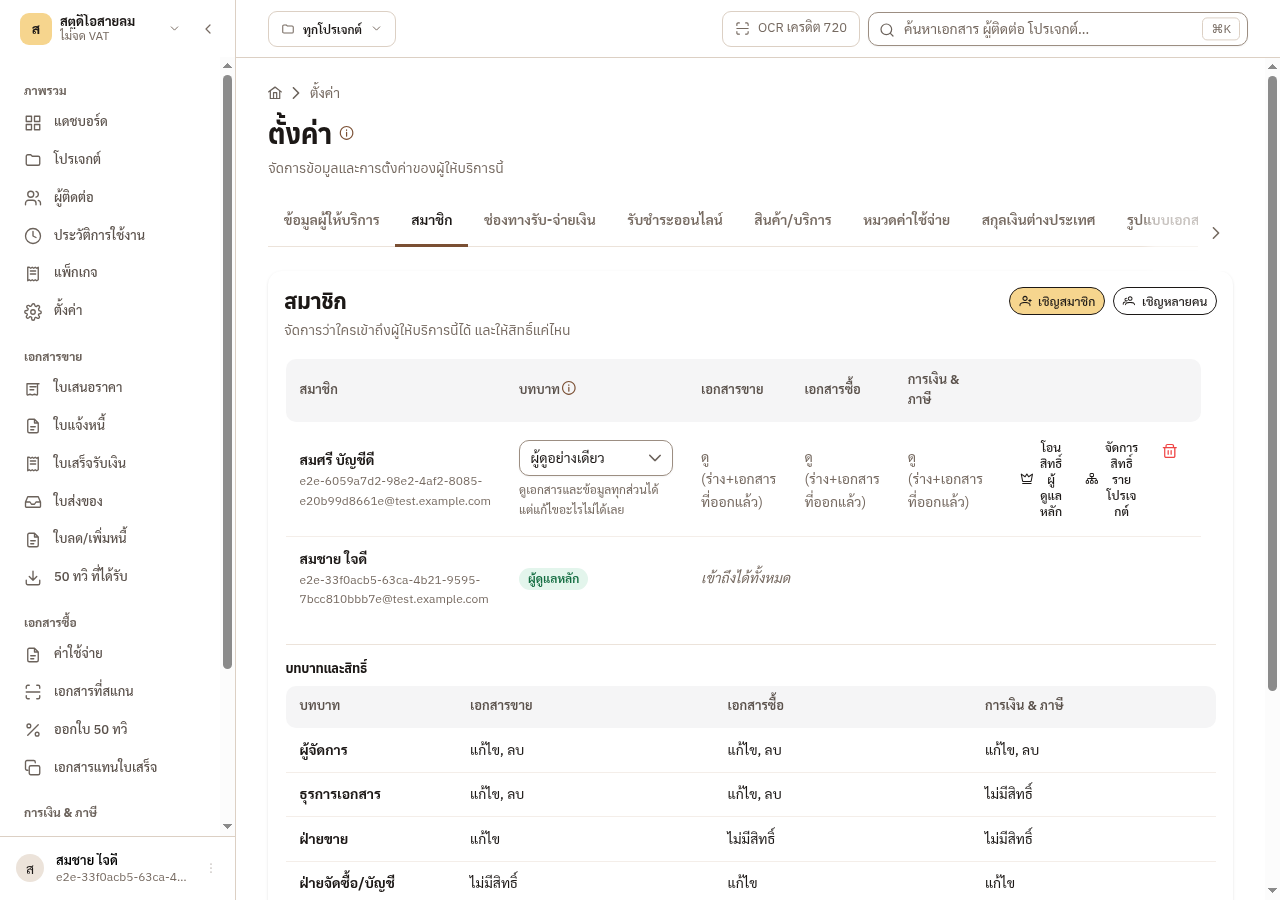
In the row of the member who takes over, press โอนสิทธิ์ผู้ดูแลหลัก.
-
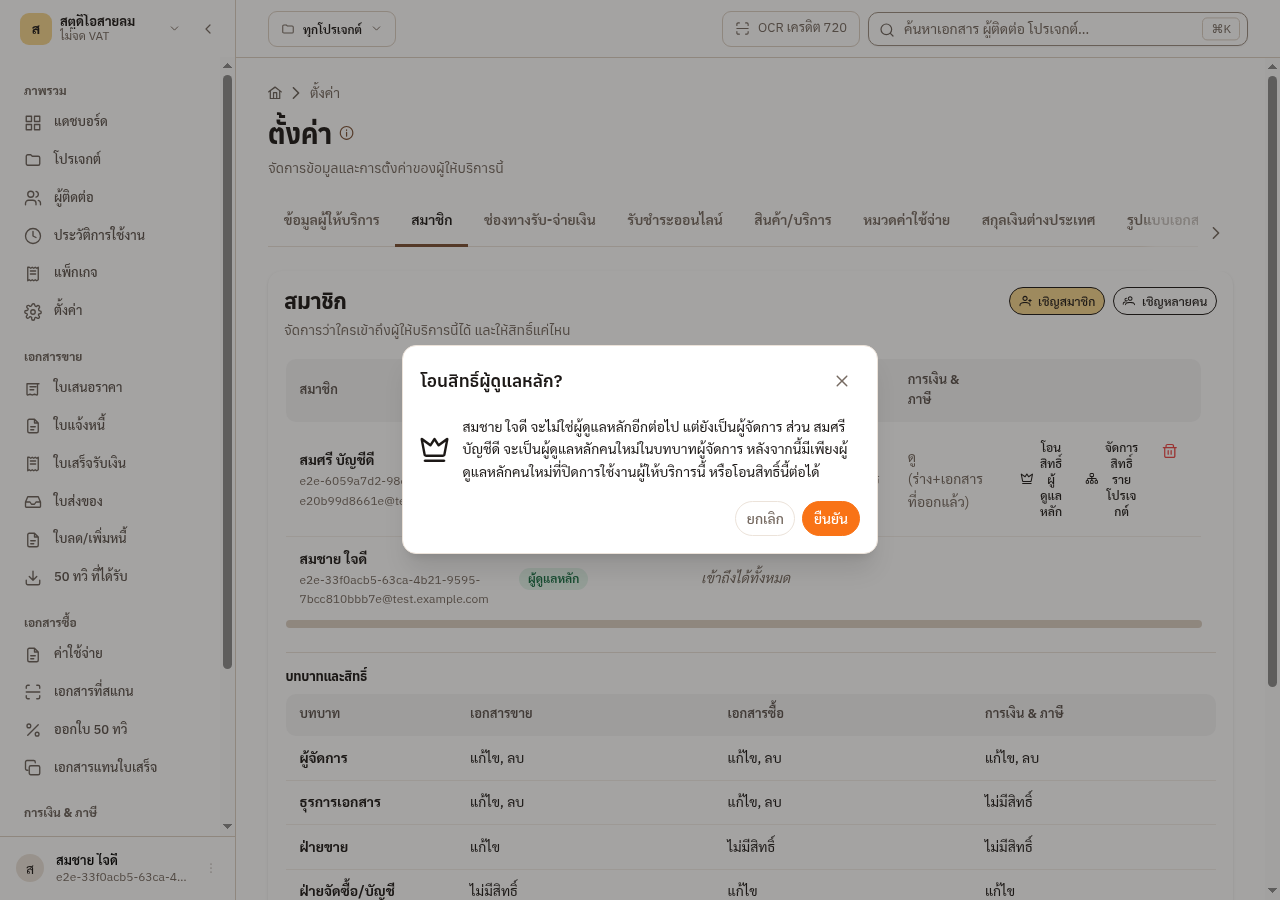
Read the confirmation and press ยืนยัน.
-
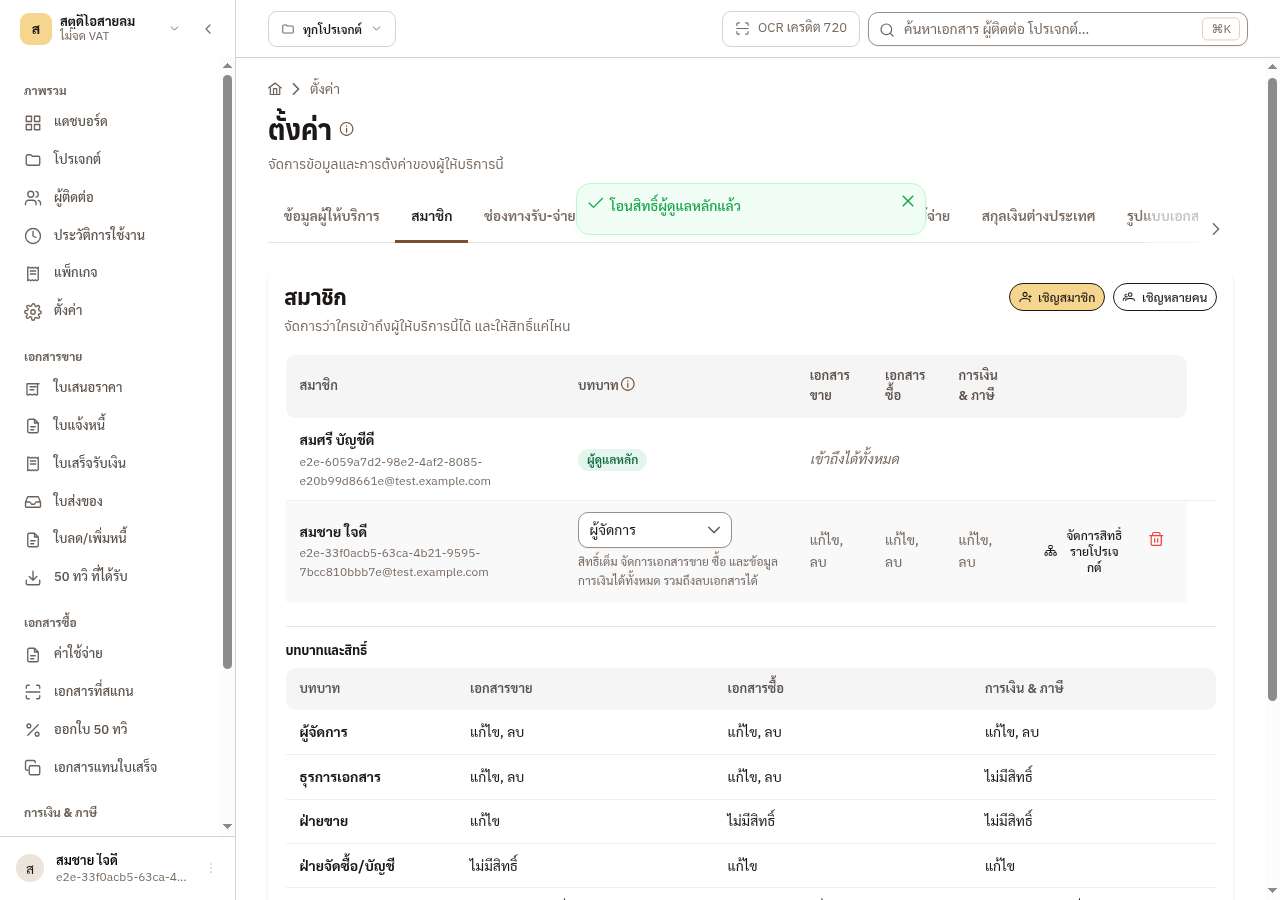
The new person’s row shows the ผู้ดูแลหลัก tag.
→ You should see: The new person is a manager, and the previous administrator stays a manager. The new person must already be an active member, and their old per-project roles are cleared.
16.7 What people without the right see
Section titled “16.7 What people without the right see”Everyone signed in can read the member list. A person who cannot manage members sees plain text, with no invite or remove buttons, no role field, and no list of pending invitations. On other pages some buttons may still show. If your role cannot do the action, EZer refuses and tells you why.
16.8 What next
Section titled “16.8 What next”Your team is in. See which roles need a package, and how to buy one.