4. Create your first project and your contacts
4.1 What a project is
Section titled “4.1 What a project is”Your provider is ready. Next you create a project. A project holds the documents, costs and profit of one job in one place. Every document lives under a project, so you cannot issue a quotation or record an expense until a project exists.
A project needs only a name. Name it after the job or the client. You do not enter a client, dates or a budget. You also do not set the project’s stage. EZer works it out from the documents issued in the project.
see section 13.1: Project stages
4.2 Create the first project
Section titled “4.2 Create the first project”The main administrator (ผู้ดูแลหลัก) and the manager can create projects. If your role cannot, you do not see the create button, and the document form tells you to ask an administrator to create a project first.
-
If you have no project at all yet, open a new invoice. The form says every document must live under a project, and the บันทึกและออกเอกสาร button stays disabled.
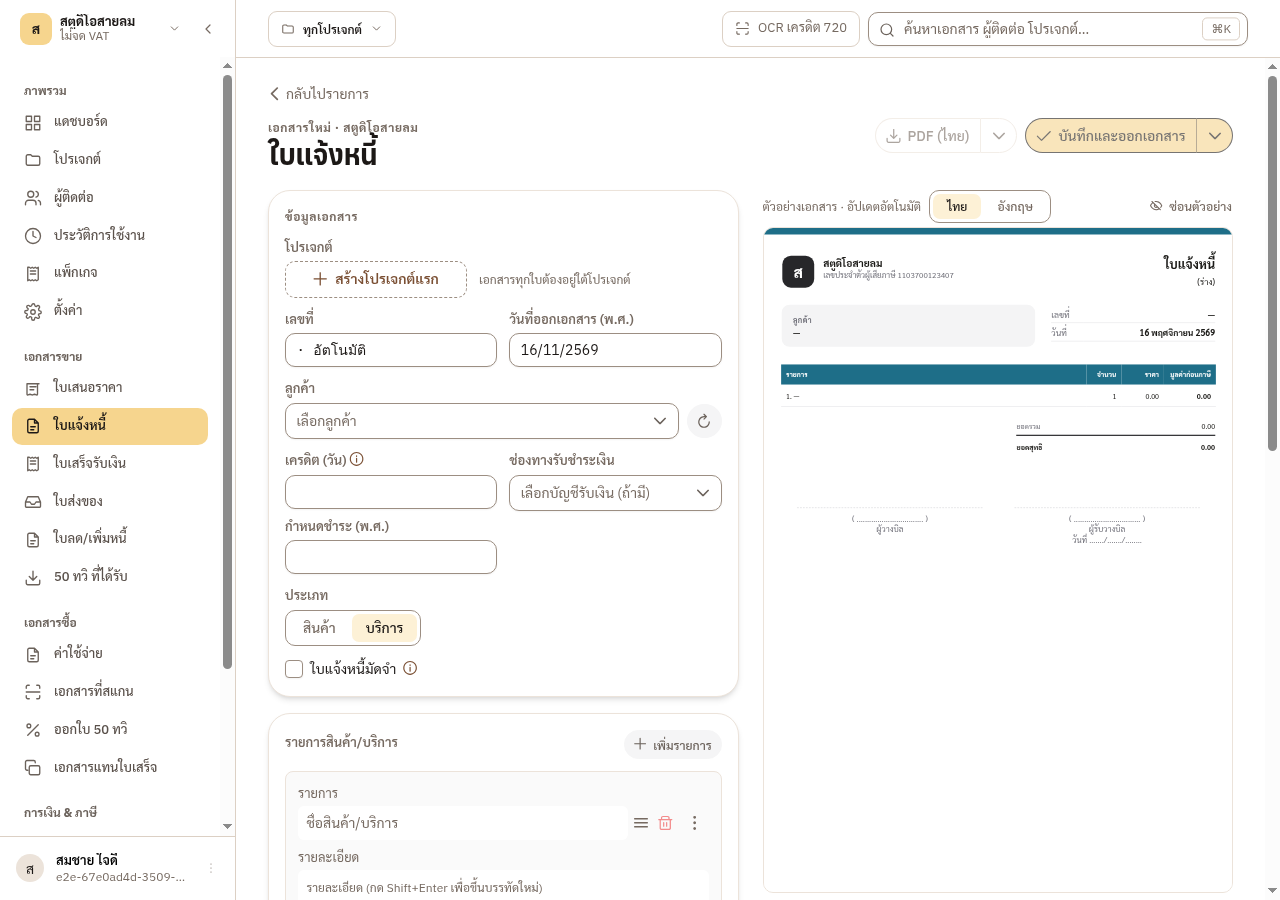
-
Press สร้างโปรเจกต์แรก and type the ชื่อโปรเจกต์, for example the client’s or the job’s name.
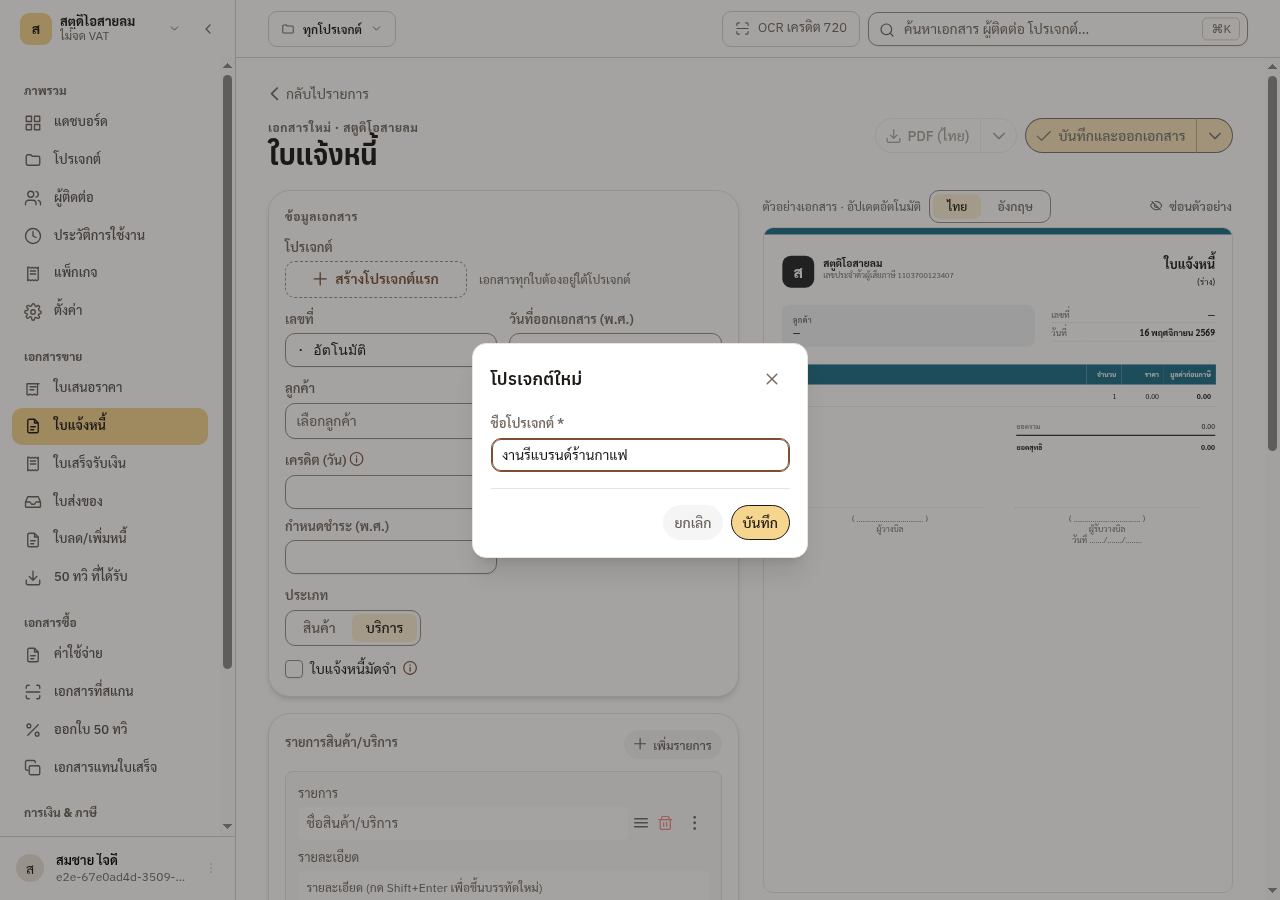
-
Press บันทึก in this window.
→ You should see: The form picks the new project for you, and the บันทึกและออกเอกสาร button works.
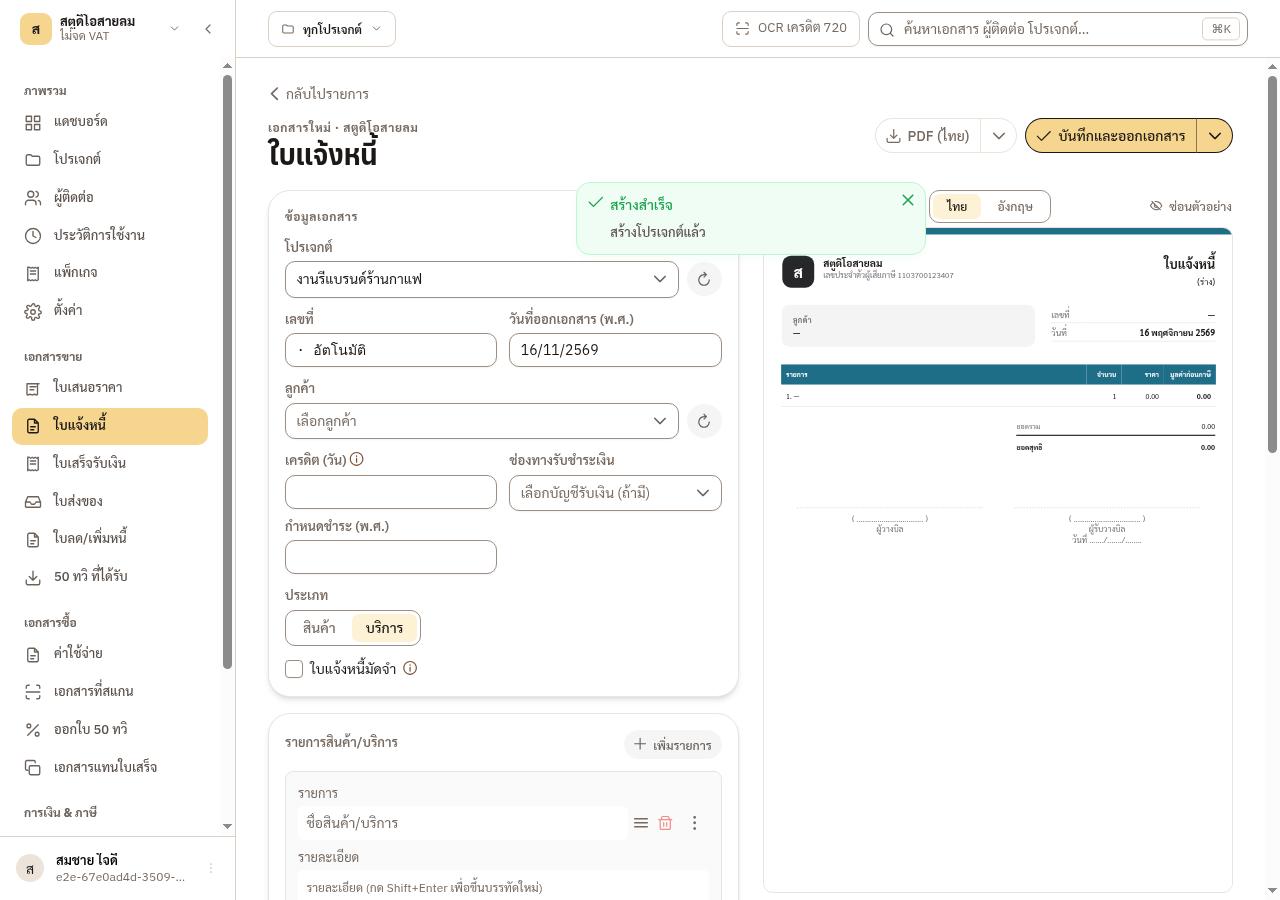
The usual way is the โปรเจกต์ menu with โปรเจกต์ใหม่. The way through the document form above appears only while you have no project at all. The create window is the same kind. To rename a project later, use เปลี่ยนชื่อ.
4.3 What a contact is
Section titled “4.3 What a contact is”The ผู้ติดต่อ menu keeps customers and vendors in one place. You enter a contact once and every project of the provider can use it. There is no customer-or-vendor switch. The role comes from use: on a quotation the contact is a customer, on an expense it is a vendor.
In a sales document form, the สร้างลูกค้าใหม่ button creates the same kind of contact. It is not a separate list.
The manager, the document clerk, sales and purchasing/accounts can create and edit contacts, and no package is needed.
4.4 Add a contact
Section titled “4.4 Add a contact”-
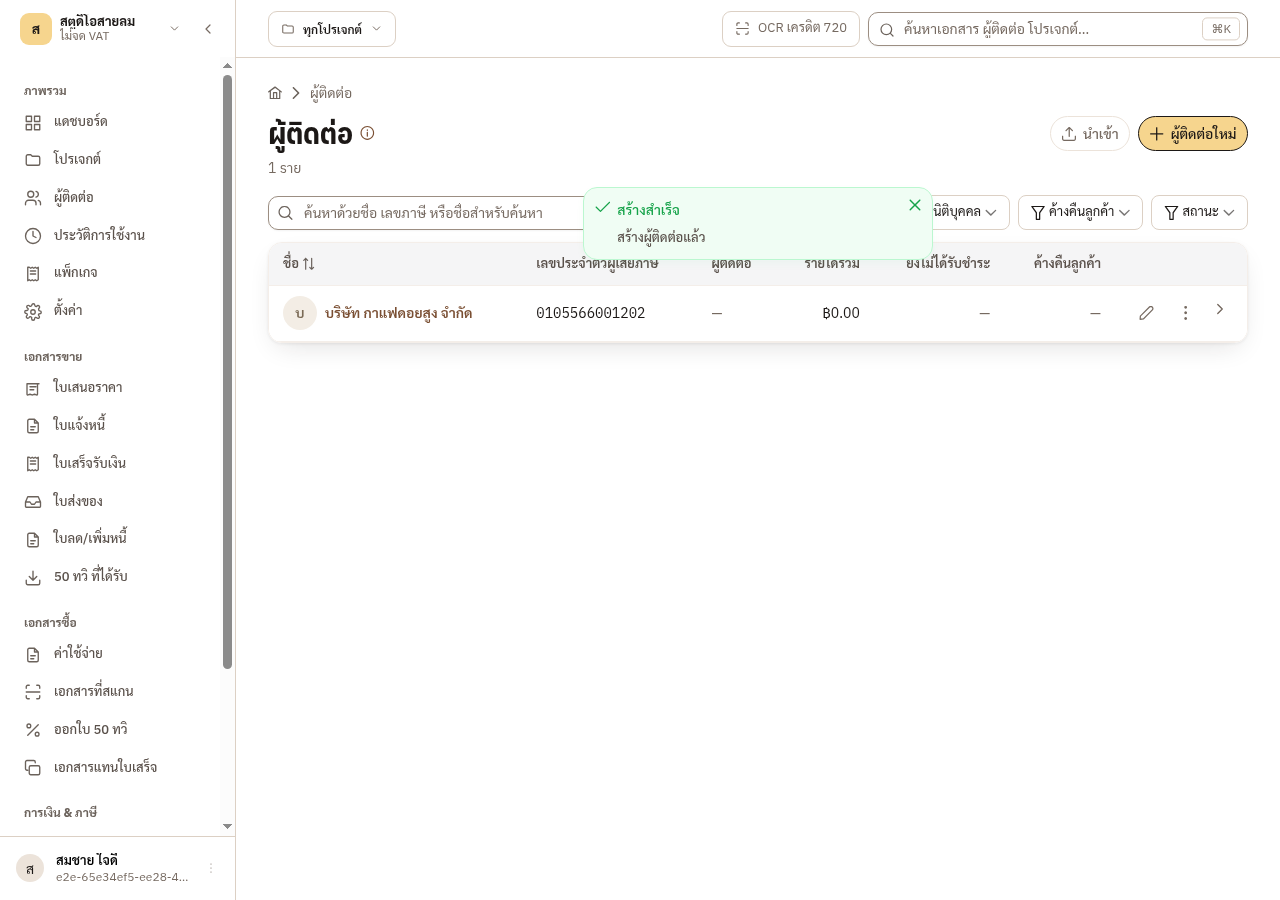
Open the ผู้ติดต่อ menu and press ผู้ติดต่อใหม่.
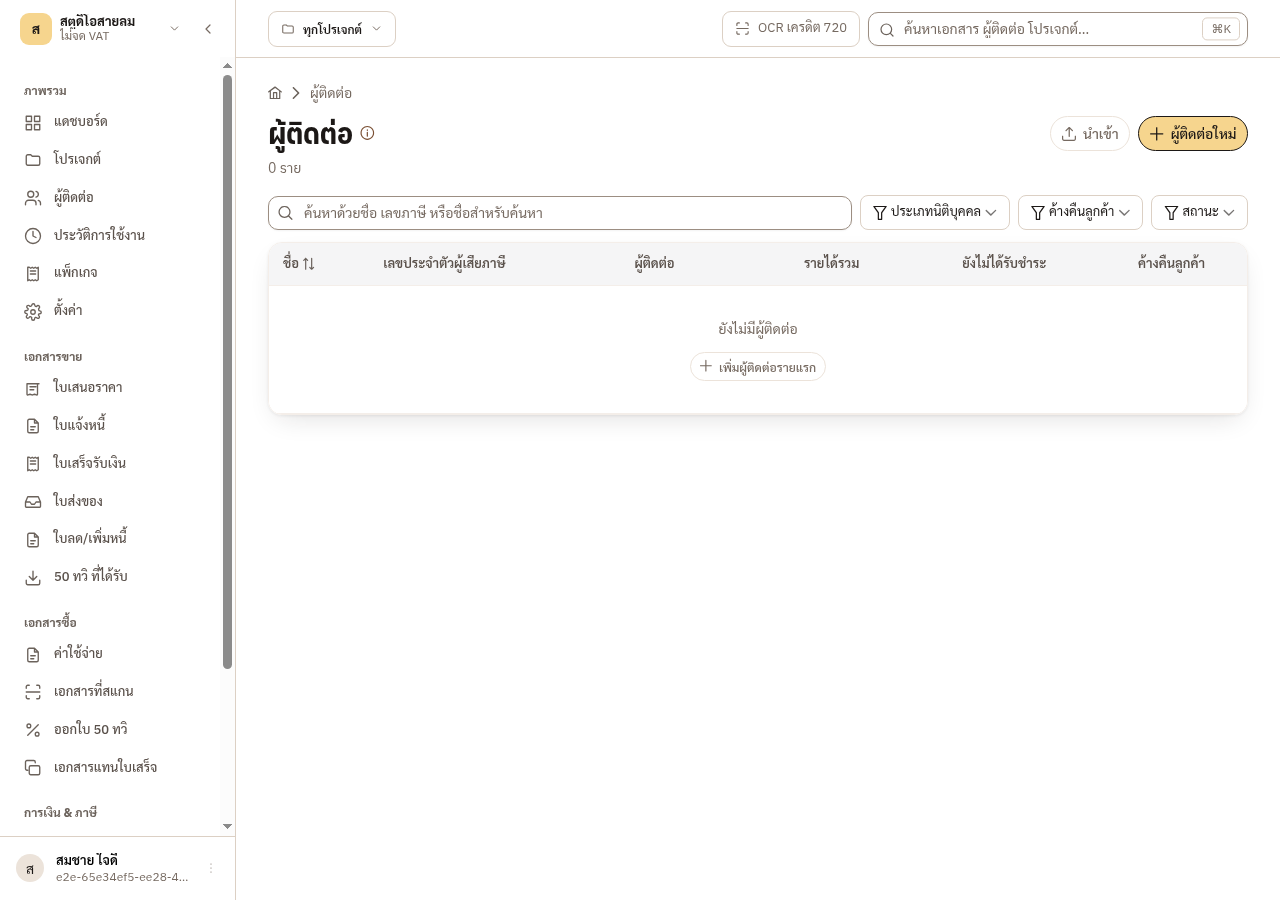
-
Choose the ประเภทผู้ติดต่อ (domestic or foreign) and the ประเภทนิติบุคคล, fill the ชื่อ, the เลขประจำตัวผู้เสียภาษี and the สาขา, then press บันทึก.
→ You should see: The new contact appears in the list.
-
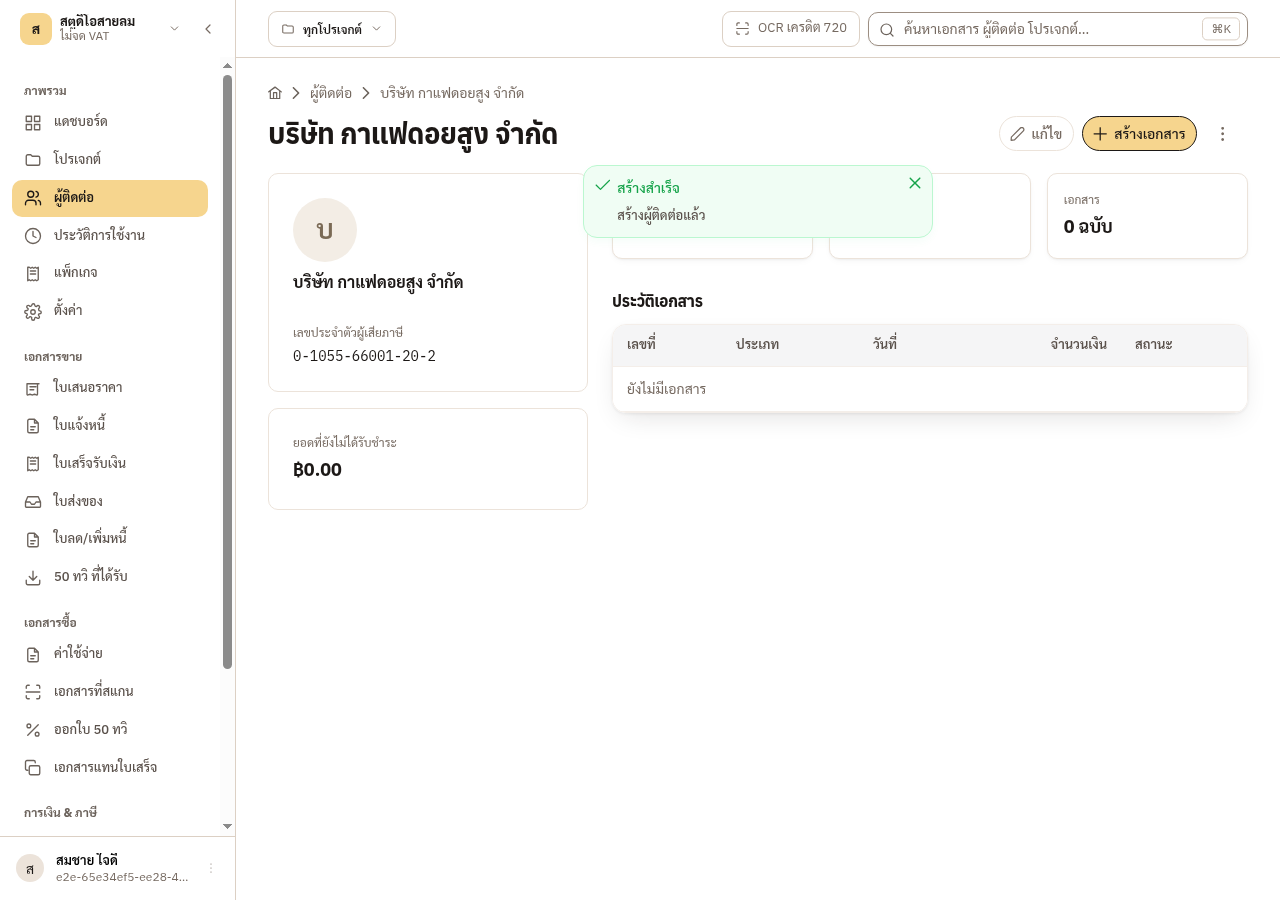
Click the contact’s name to see the details. From there you can press แก้ไข, or press สร้างเอกสาร, which takes you to pick a project first.
Choose the type that matches the person
Section titled “Choose the type that matches the person”The form starts as นิติบุคคลไทย (a Thai company). If the contact is a person, change it yourself. The type decides the withholding-tax rate EZer offers when you pay them, so choose the one that matches their legal identity. There are six choices.
- บุคคลธรรมดา (ไทย): a Thai individual.
- นิติบุคคลไทย: a Thai company or other juristic person.
- หน่วยงานรัฐ: a government body.
- นิติบุคคลต่างชาติ: a foreign company.
- บุคคลต่างชาติ: a foreign individual.
- มูลนิธิ / สมาคม: a foundation or an association.
EZer shows a gentle warning when the name or tax ID does not look like the chosen type, for example a number that starts with 0 belongs to a company. It is only a warning, and the choice stays yours. The withholding-tax rate rules are not in this manual.
Tax ID, branch and DBD data
Section titled “Tax ID, branch and DBD data”- A contact is one tax ID plus one branch. If the number and branch match an existing contact, EZer refuses to save. A blank branch means the head office (00000). Another branch is a separate contact. Contacts with no tax ID may repeat. A Thai 13-digit number with a wrong check digit is refused.
- To use data from the Department of Business Development (DBD), fill the เลขประจำตัวผู้เสียภาษี first, then click out of the field. For a valid company number, EZer offers พบข้อมูลบริษัทนี้ — คลิกเพื่อใช้. It offers this only while the name and address are still empty. Check the data in the window that opens before you use it. The data is the head office’s, has no postcode, and can be out of date.
- Choose foreign as the ประเภทผู้ติดต่อ and you may leave the Thai tax ID blank. For a foreign individual, a passport number field appears.
To add many contacts at once, use the นำเข้า button on the contacts page. EZer gives a template and previews each row before importing.
4.5 Change a contact later
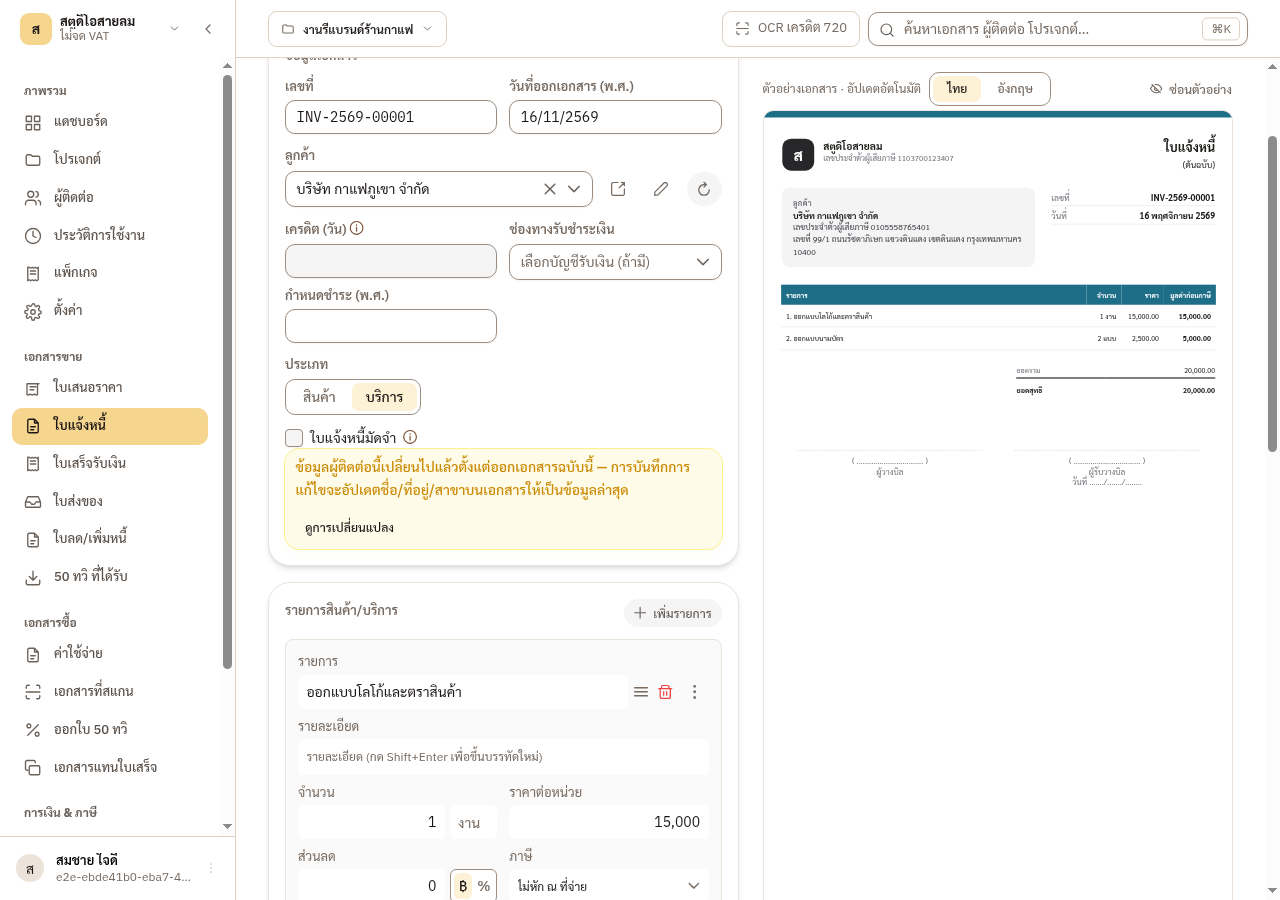
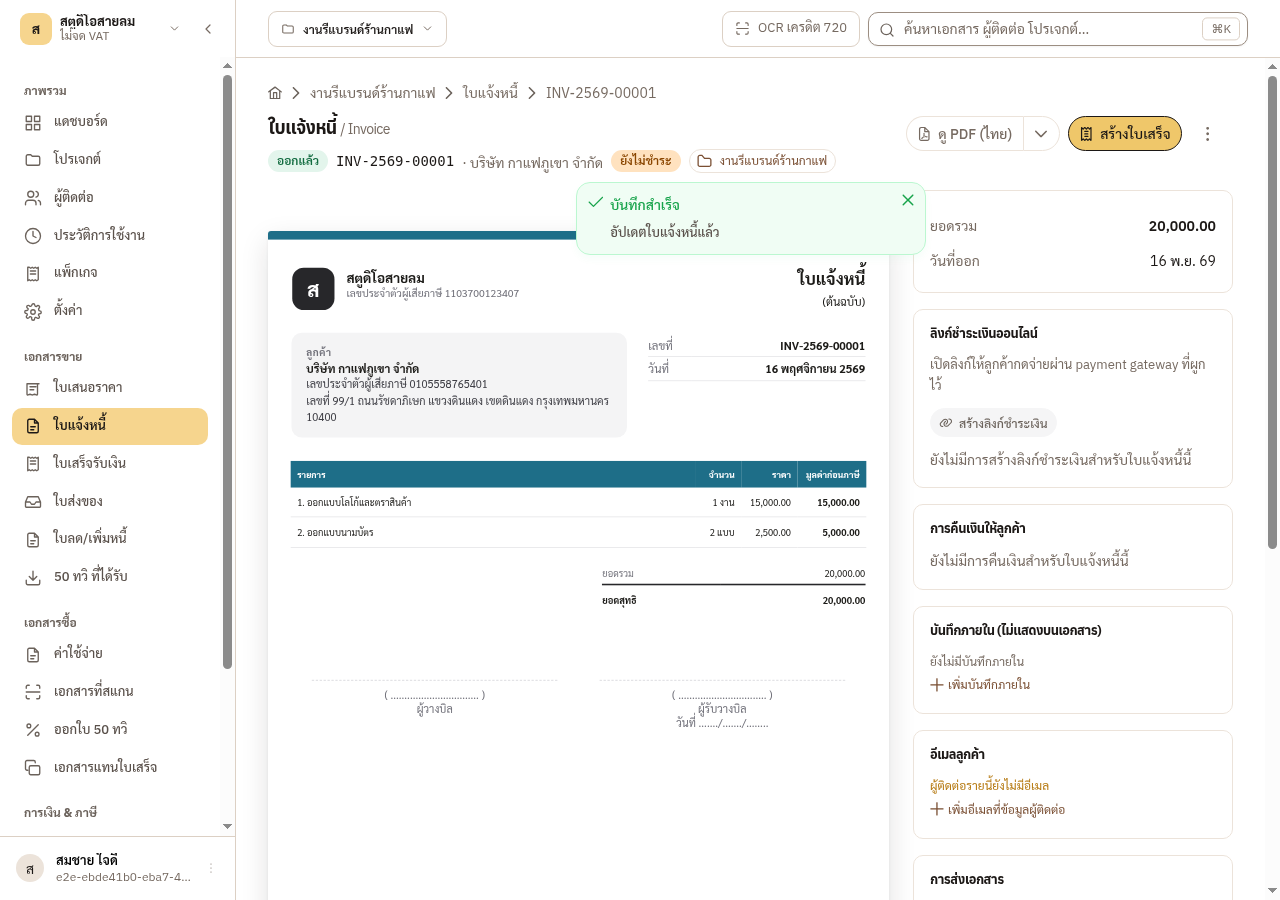
Section titled “4.5 Change a contact later”Editing a contact does not change documents already issued. Such a document still prints the old address. But if you open an issued document that is not yet locked and save it, it takes the contact’s latest details. The form warns you first that the contact has changed. A document that is locked, or in a closed month, cannot be changed.
-
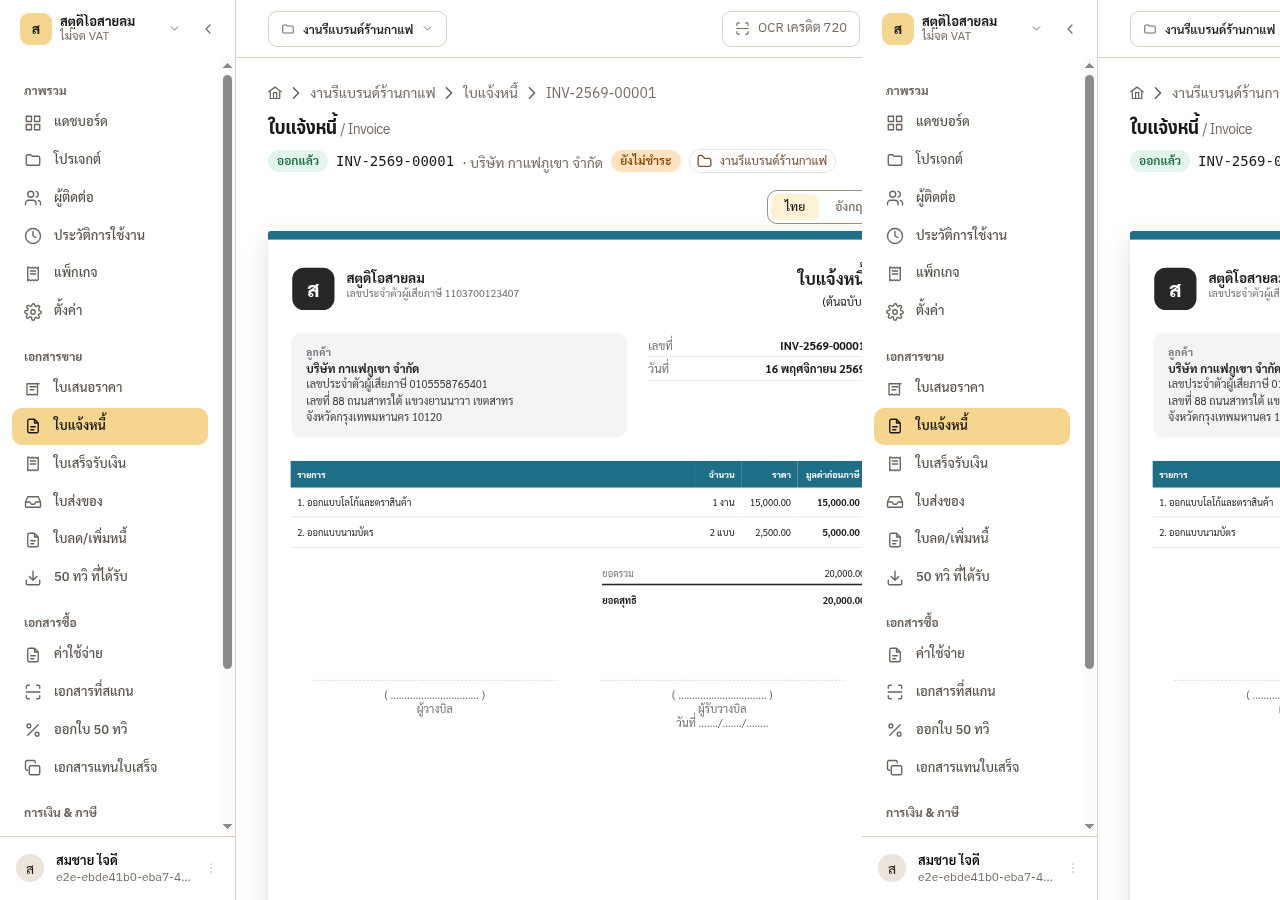
After you change a contact’s address, an already issued document still shows the old address.
-
Open that document to edit it. The form warns that the contact has changed.
-
After you save, the document carries the new address.
Duplicates, retiring and deleting
Section titled “Duplicates, retiring and deleting”- EZer has no merge button for contacts. If you have a duplicate, archive one with เก็บเข้าคลัง.
- เก็บเข้าคลัง hides the contact from lists and pickers, can be undone with กู้คืน, and leaves issued documents untouched.
- ลบถาวร is refused if a sales document or an advance entry uses the contact. Archive it instead.
4.6 What next
Section titled “4.6 What next”With a project and a contact, you can issue your first sales document.