7. Record an expense by LINE or by upload
7.1 Two ways in, and what to remember
Section titled “7.1 Two ways in, and what to remember”You can send a bill into EZer two ways: send a photo or file by LINE, or upload it on the web from the expenses (ค่าใช้จ่าย) page. Both do the same thing first. They store the file and let EZer help read the bill.
EZer helps read the bill and does not decide for you. It can read wrongly, so always compare the form with the real bill. EZer does not pick the project from what the bill says. The project comes from the LINE group you linked, from your choice, or from your choice on the form.
Uploading and saving expenses needs a role that works on documents and a package that is in use. A linked LINE group still stores files, but EZer does not read them until the business is activated and has credits. For packages and credits, see the chapter on packages and billing.
see section 17.10: Packages and billing
7.2 Link your LINE
Section titled “7.2 Link your LINE”There are two kinds. The first links your own LINE account, so you send bills in a one-to-one chat with the EZer LINE OA. The second links a LINE group to a project, so anyone in the group can send bills, even without an EZer account.
Link your own account
Section titled “Link your own account”-
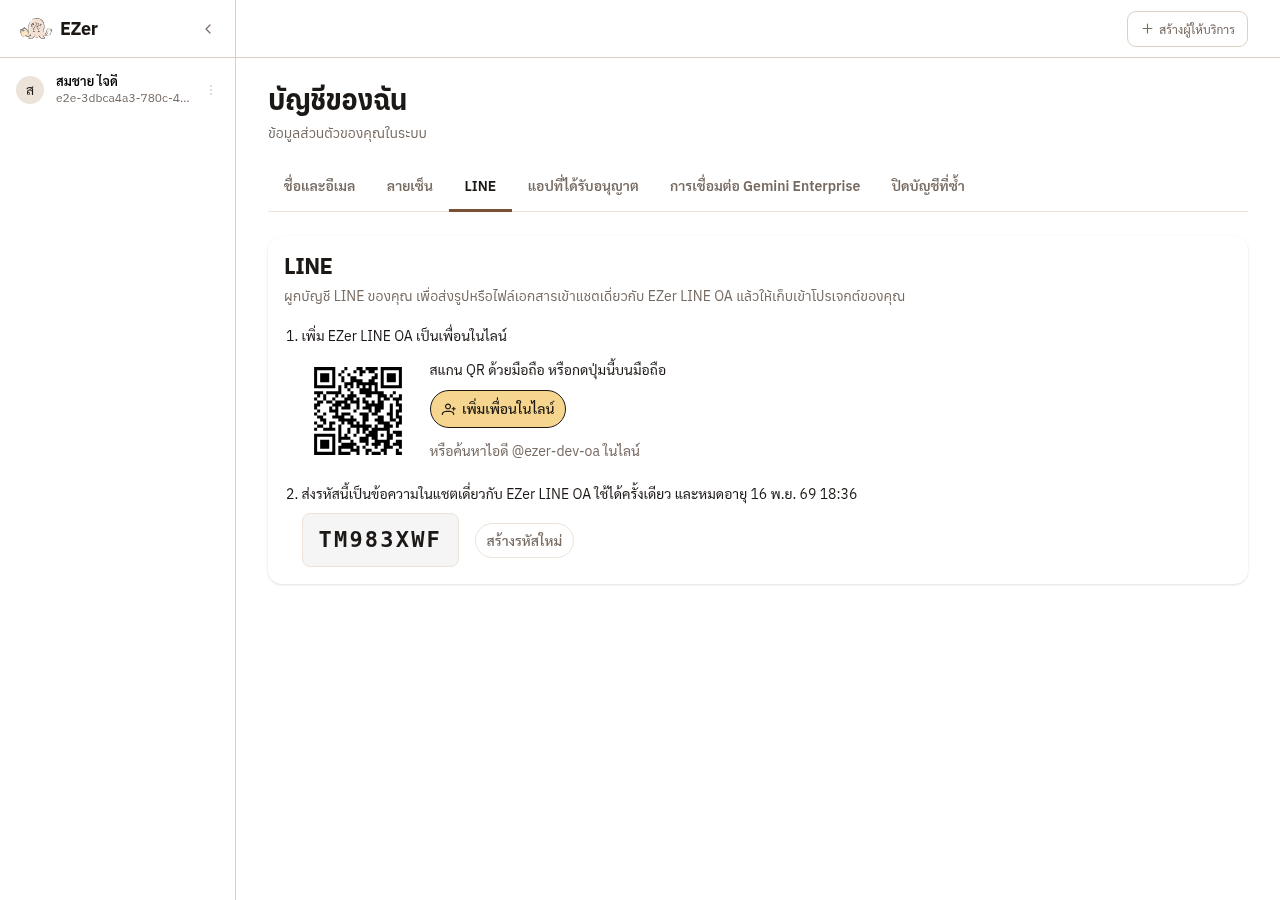
On your account page, open the LINE tab and press ผูกบัญชี LINE. Add the EZer LINE OA as a friend, then send the code you see as a message in the one-to-one chat.
→ You should see: The code works once and expires in 15 minutes.
-
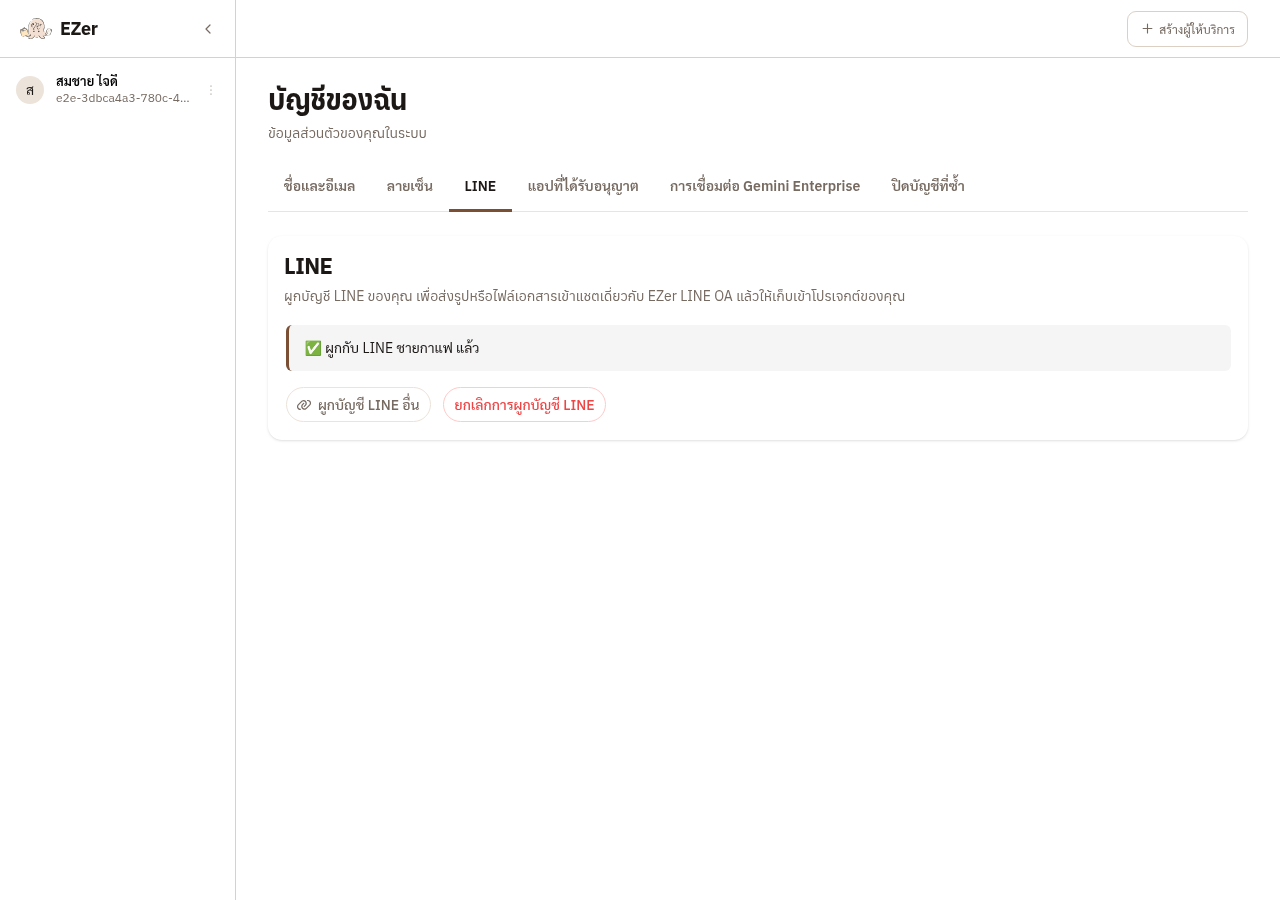
Wait a moment. The page shows that your LINE is linked.
Link a LINE group to a project
Section titled “Link a LINE group to a project”-
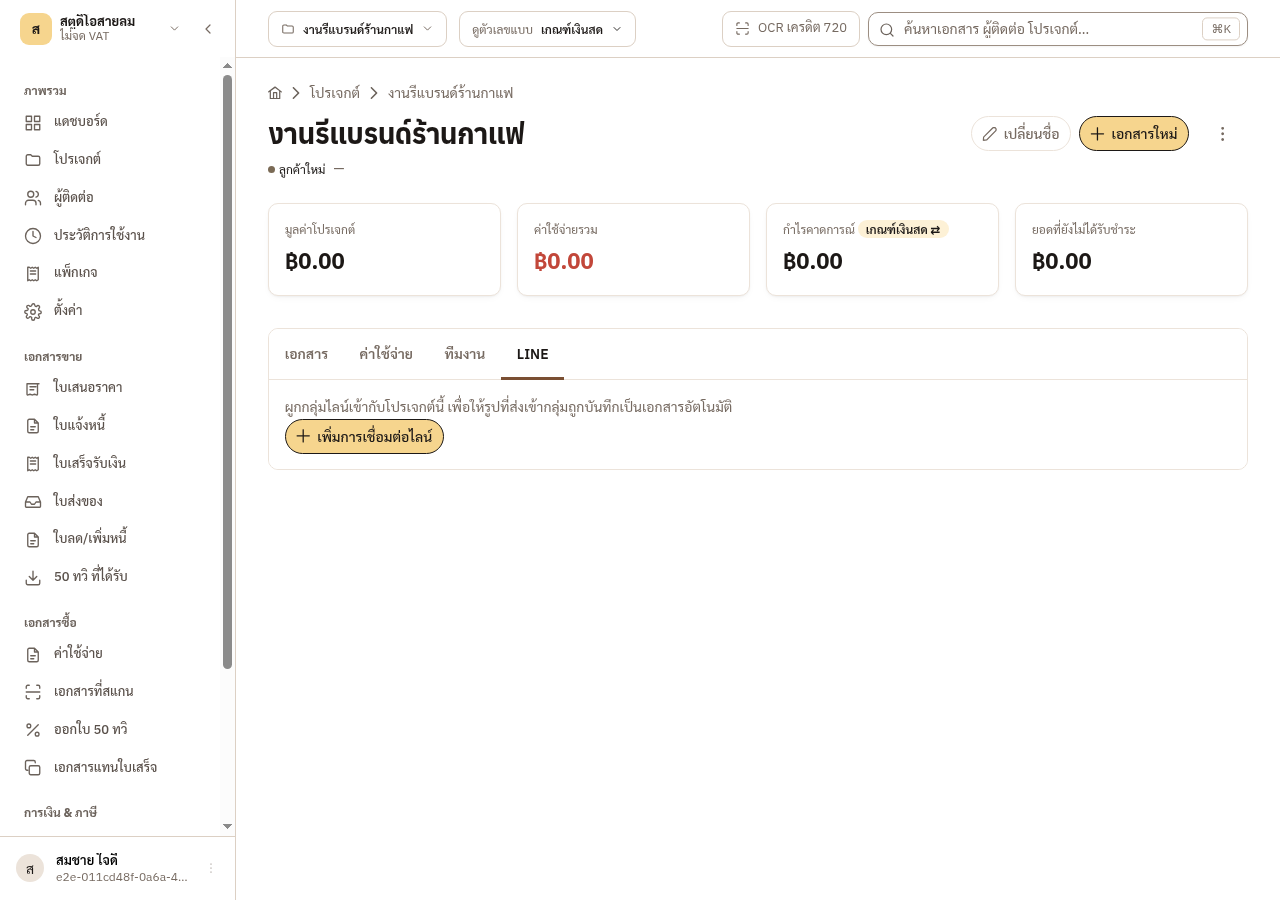
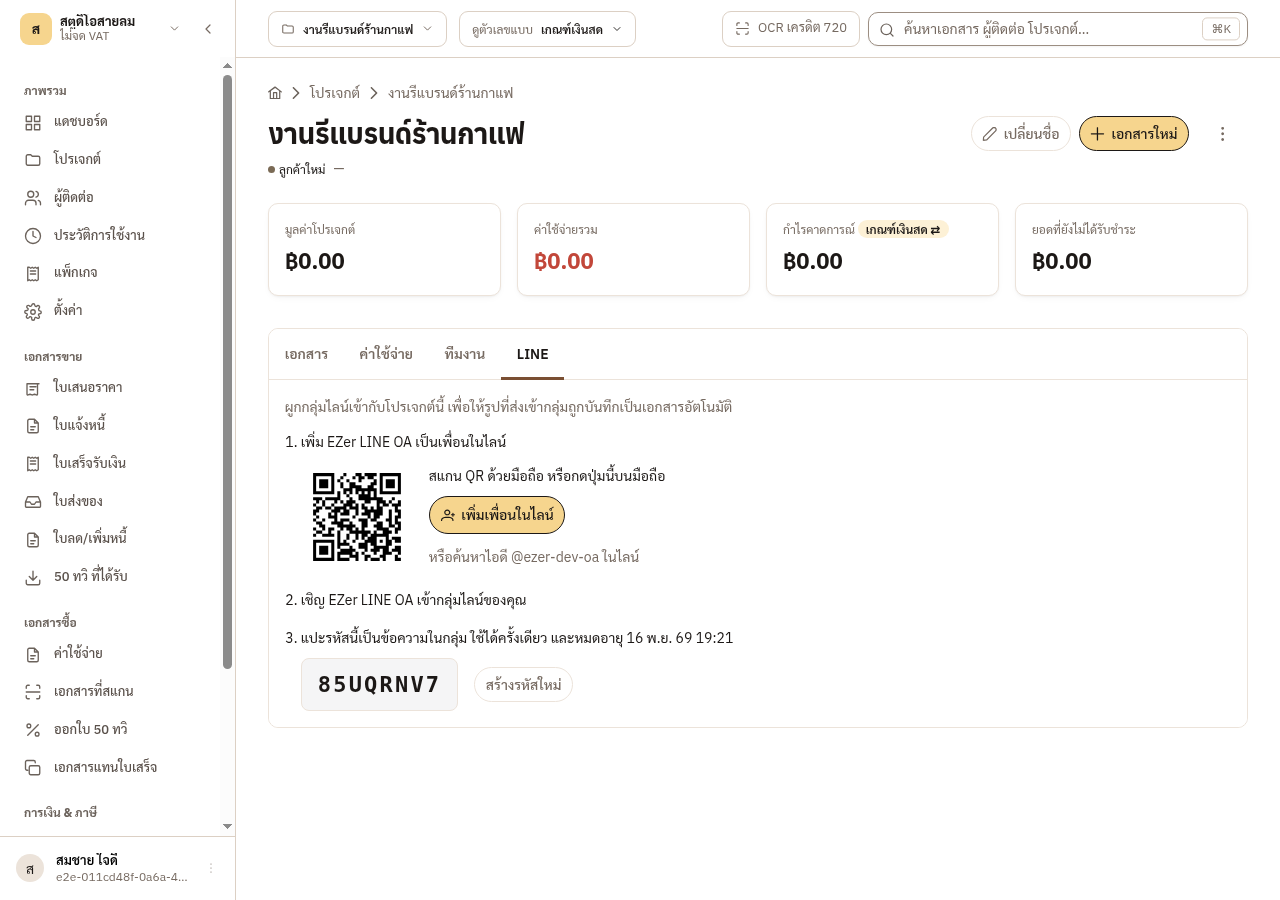
On the project page, open the LINE tab and press เพิ่มการเชื่อมต่อไลน์.
-
Invite the EZer LINE OA into the LINE group, then paste the code as a message in the group.
→ You should see: The code works once and expires in 60 minutes. Never post your personal link code in a group.
-
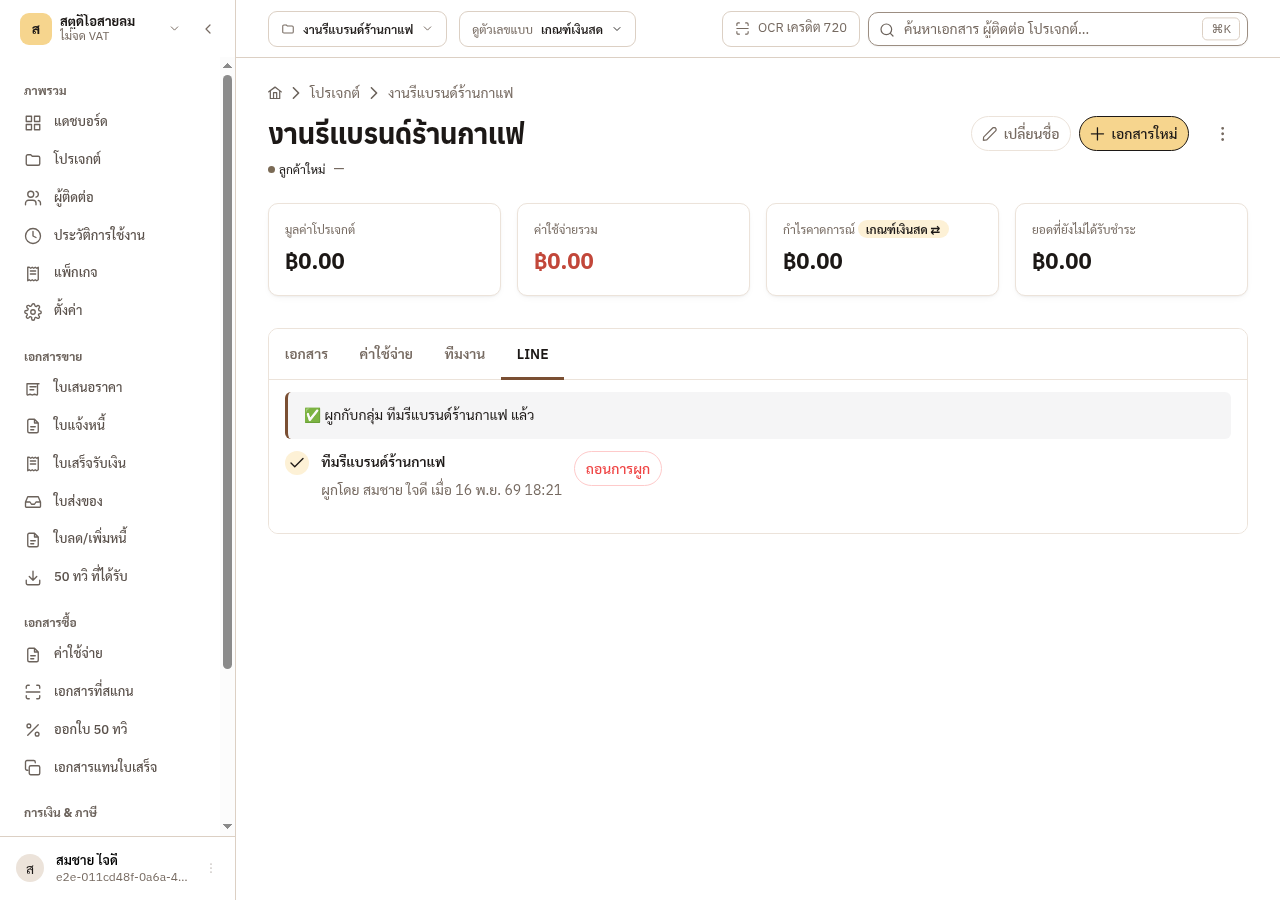
The project page shows the group as linked.
→ You should see: One project links to one group, and one group links to one project.
7.3 Send a bill by LINE
Section titled “7.3 Send a bill by LINE”Send a photo or a PDF into the chat. EZer accepts JPEG, PNG, WebP and PDF files up to 20 MB. If you send several photos at once, the bot asks once whether to merge them into one document or keep them apart.
What the bot replies
- บันทึกไฟล์แล้ว with a link, เข้ามายืนยันค่าใช้จ่ายได้ที่. The link opens the scanned document page, not the expense form.
- If you send the same file again, the bot says the file already exists and links to the first copy.
- If EZer cannot read the file yet, for example when credits run out, the bot says why. The file is still stored, and you can fill in the expense yourself from it.
Which project the file goes to
Section titled “Which project the file goes to”- In a linked group, the file goes to the project linked to that group. The sender needs no EZer account.
- In a one-to-one chat, you must have linked your account, be allowed to edit the business’s data, and be able to see that project’s expenses. If you have several projects, the bot sends a card to choose from. It remembers your choice until the chat has been silent for one hour, and files later photos in that period to the same project without asking.
7.4 Upload on the web
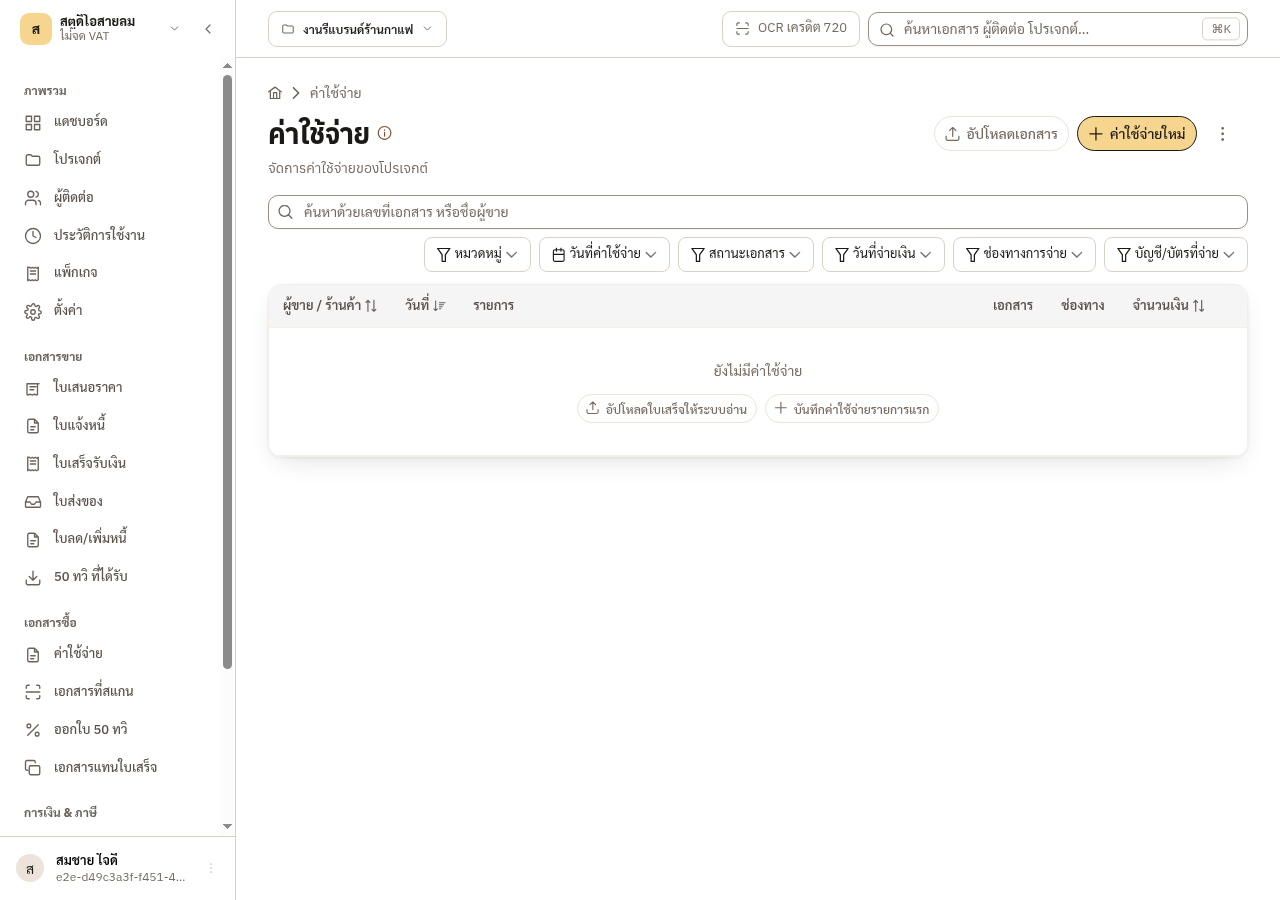
Section titled “7.4 Upload on the web”Use this when the bill is already on your computer. Open the ค่าใช้จ่าย page and follow these steps. The pictures use a sample file whose reading is replayed. Your own file may read differently.
-
On the expenses page, press อัปโหลดเอกสาร. If the list is empty, press อัปโหลดใบเสร็จให้ระบบอ่าน.
-
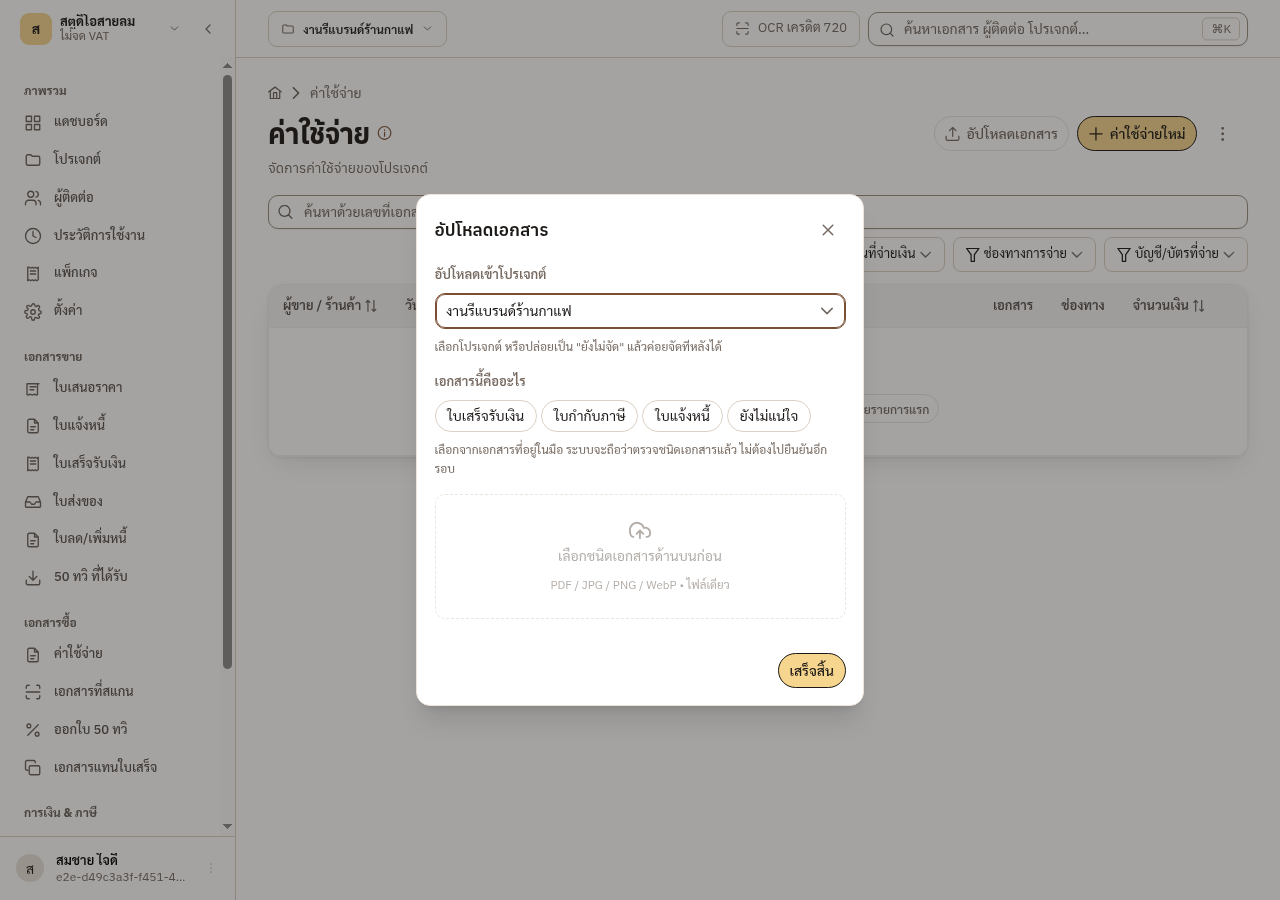
In the upload window, choose the project under อัปโหลดเข้าโปรเจกต์, then the kind under เอกสารนี้คืออะไร: ใบเสร็จรับเงิน, ใบกำกับภาษี, ใบแจ้งหนี้ or ยังไม่แน่ใจ. Pick the kind first, because the drop area stays inactive until you do. Then drop the file or click to choose it.
→ You should see: This window takes one file at a time. For many files, upload on the scanned documents page.
-
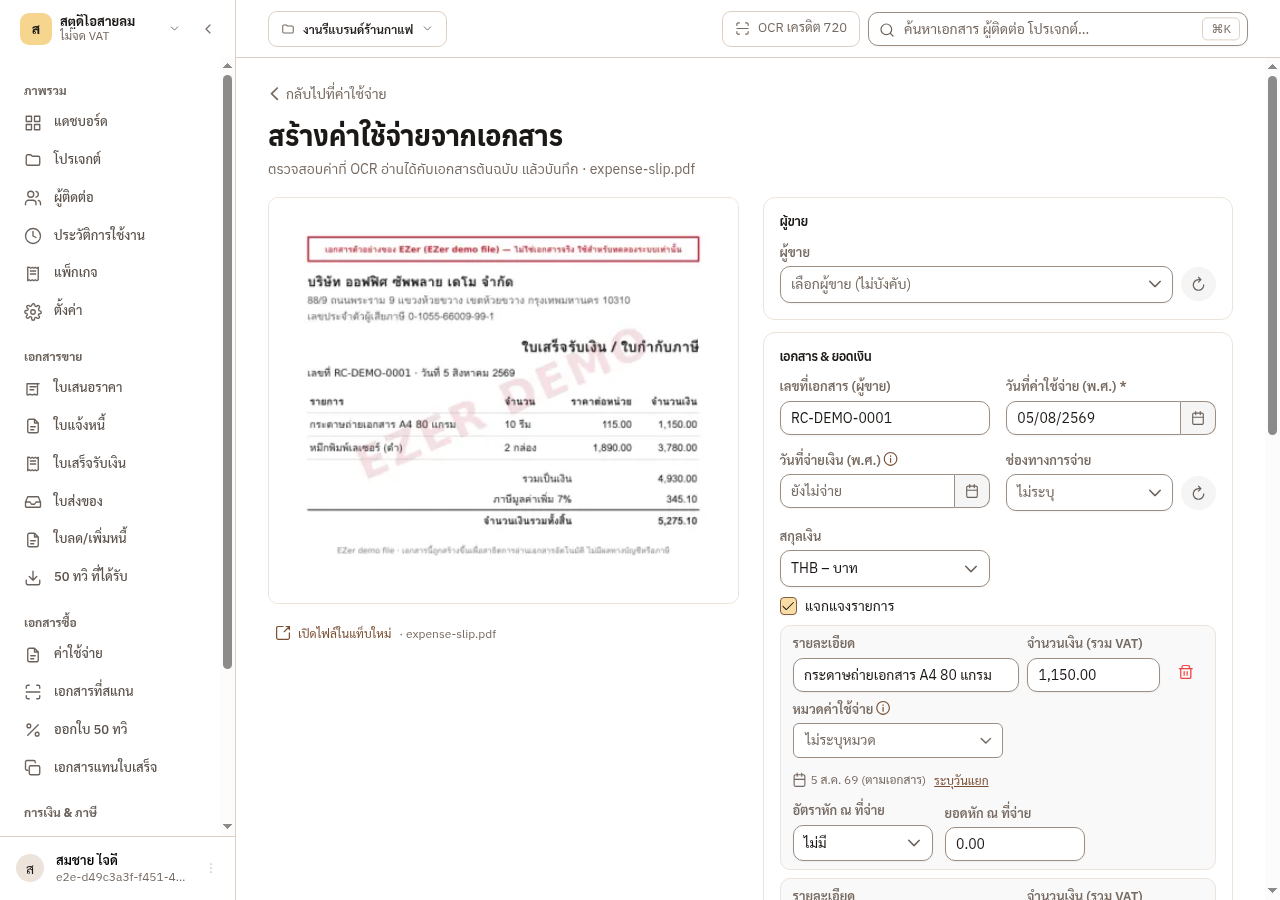
EZer takes you to the สร้างค่าใช้จ่ายจากเอกสาร form and starts reading the document.
→ You should see: The form fills itself when the reading ends. You do not refresh the page. If EZer cannot read the file, the form says why and you fill it in yourself.
-
Compare every field with the real bill, especially the vendor, document number, date, amounts, VAT and withholding tax. Choose the project and the category yourself.
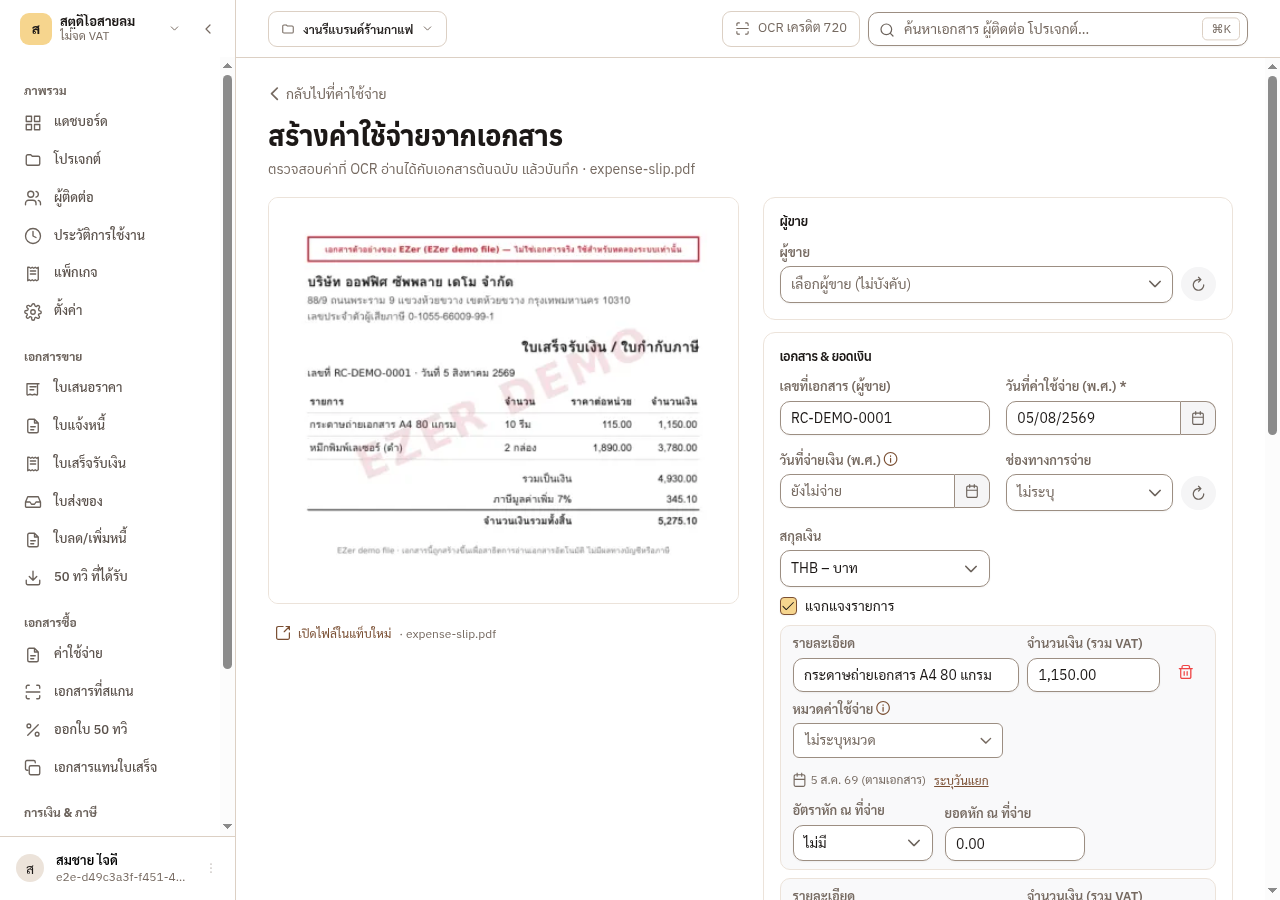
-
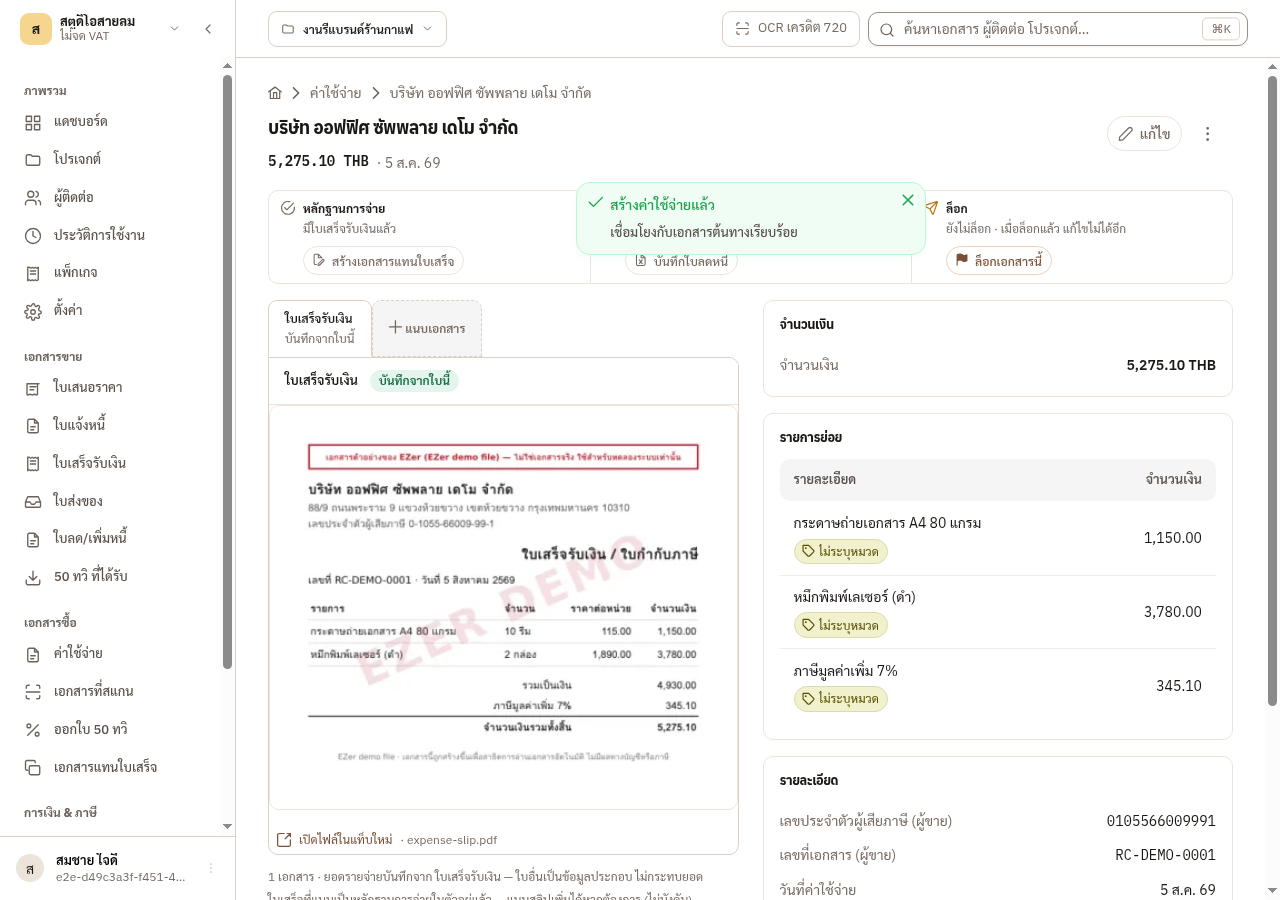
Press บันทึกค่าใช้จ่าย.
→ You should see: You get an expense tied to its source file, and the project’s profit changes from now on.
What EZer fills in and what it leaves
Section titled “What EZer fills in and what it leaves”EZer fills in:
- the lines (one per printed row), the vendor’s name and tax ID, the document number, withholding tax per line, input VAT (if the business is VAT-registered; if not, EZer folds the VAT into the cost), the date and the currency.
- If a transfer slip is in the same file, it also fills in the paid date and the payment channel.
EZer leaves these to you:
- whether it is an asset, non-deductible costs (รายจ่ายต้องห้าม), the withholding condition, the input VAT type and evidence, and the project. OCR does not read the category, but the form may suggest or fill one from the vendor’s history. Always check it.
- EZer never overwrites what you typed. If the reading ends later, a ใช้ข้อมูลจาก OCR button lets you apply it yourself.
If the bill’s lines do not add up to the printed total, EZer uses the total as one line and tells you. To itemise, fill in the lines yourself. An invoice is normally not yet a cost, so record the expense when you have the receipt or tax invoice.
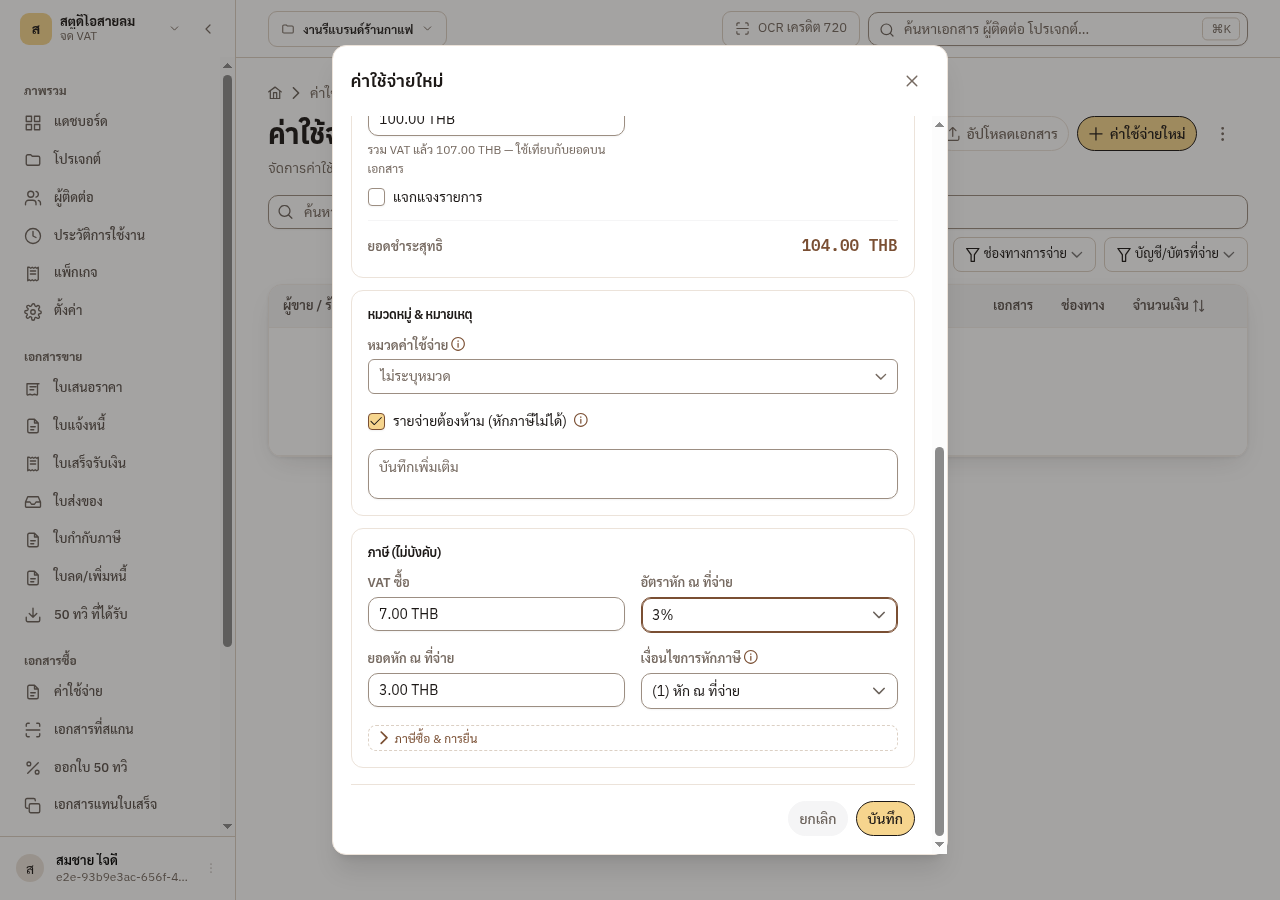
Figure 7-1: Input VAT and withholding tax sit in the same form, and EZer works out the net payable.
7.5 Files from LINE waiting for your check
Section titled “7.5 Files from LINE waiting for your check”Files sent by LINE wait under the เอกสารที่สแกน menu, and the link the bot sends brings you here. A file with no declared kind starts as ยังไม่ตรวจ. EZer guesses the kind, and you look at the image and confirm it yourself.
-
Open the เอกสารที่สแกน menu and find the unchecked file.
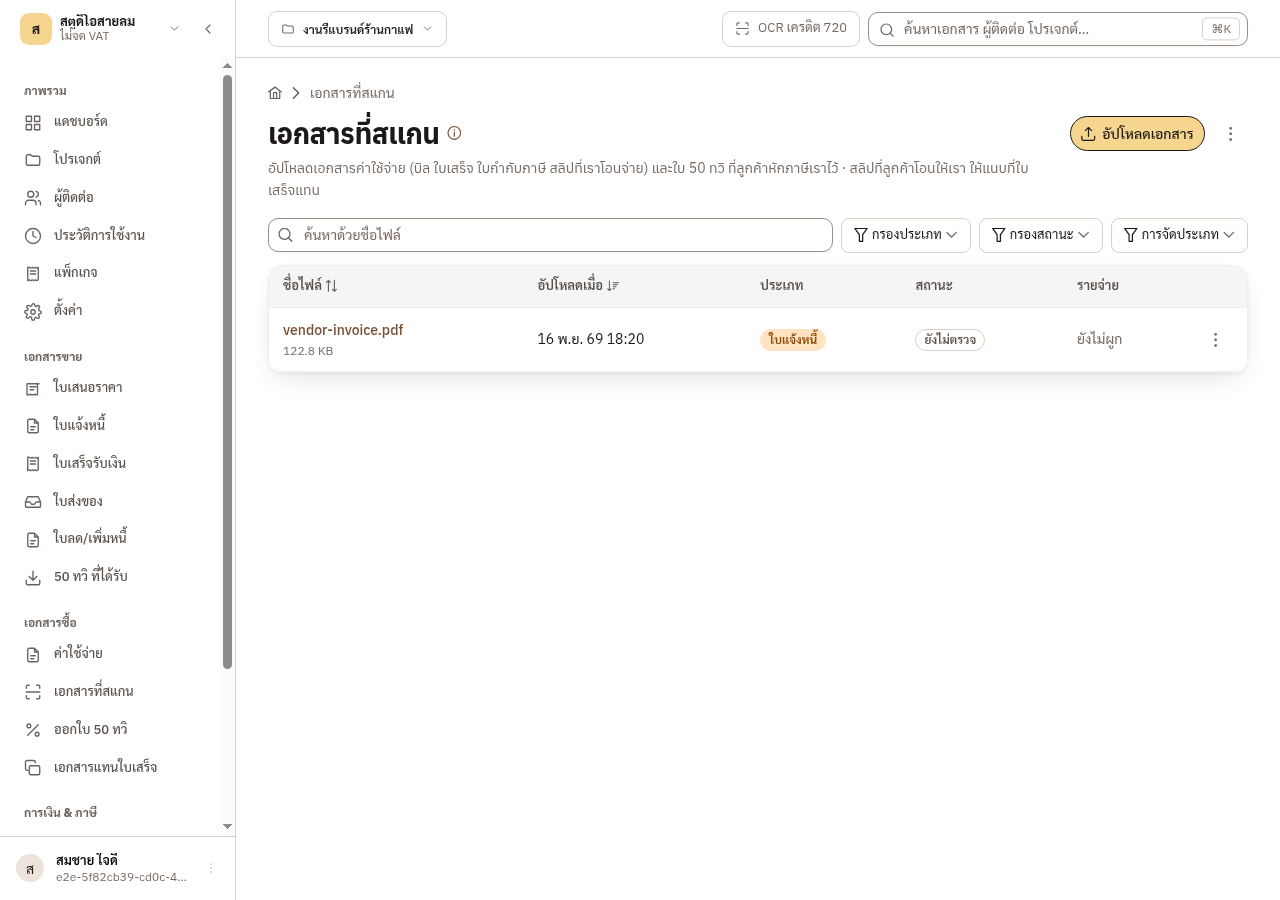
-
Open the file and look at the image on the left.
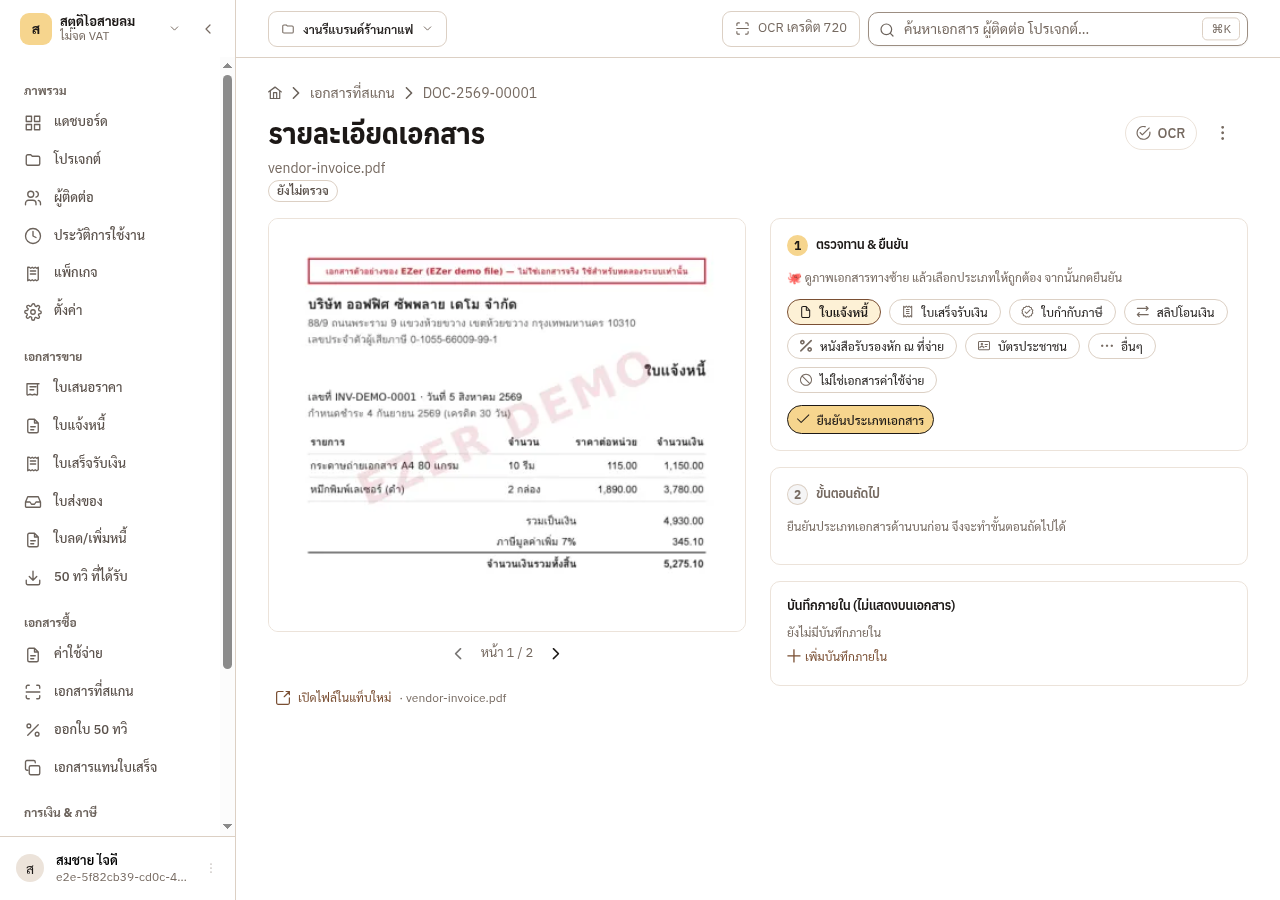
-
See the kind EZer guessed. If it is wrong, choose the right kind, then press ยืนยันประเภทเอกสาร.
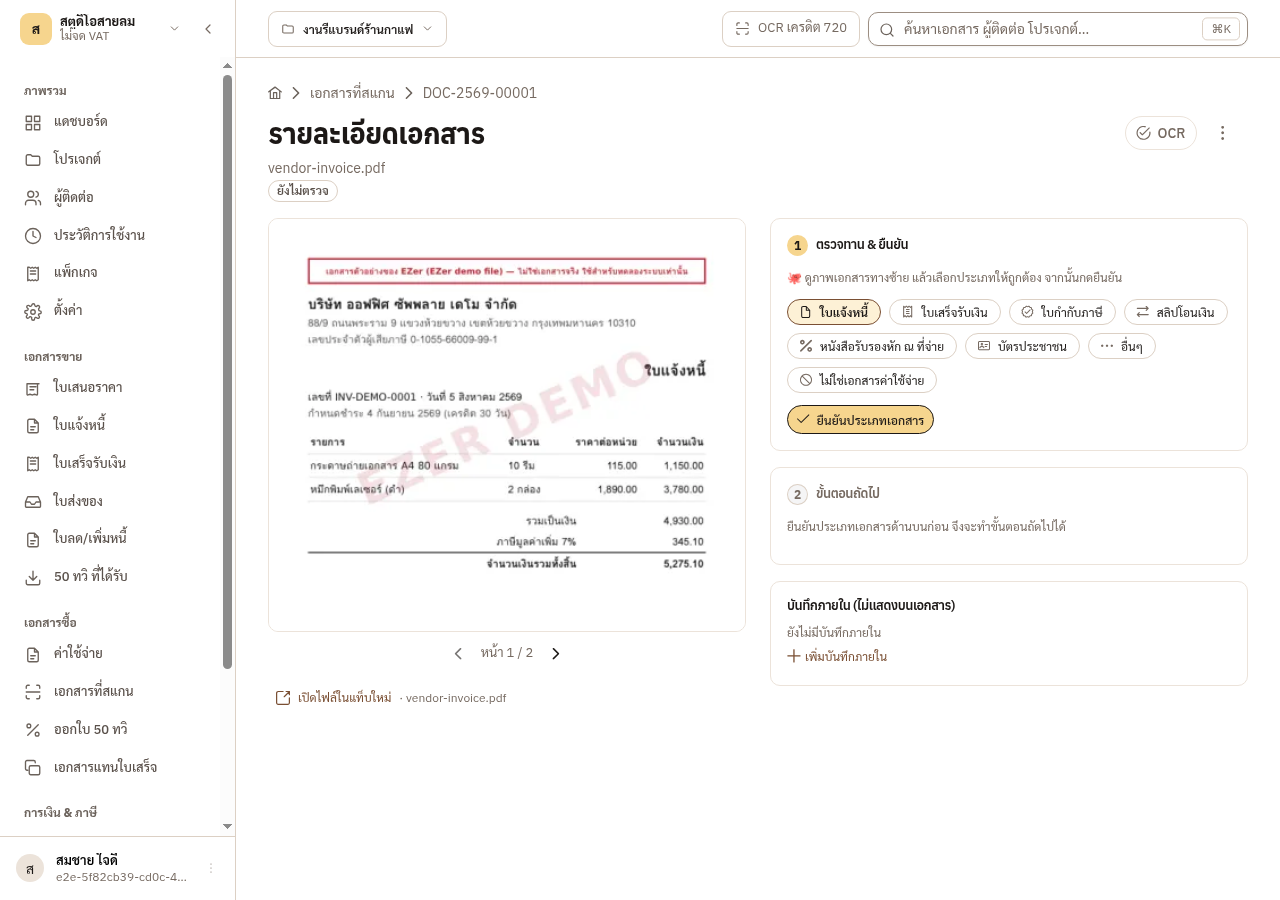
-
Press the OCR button in the page header to open รายละเอียด OCR and see what EZer read.
→ You should see: Then press สร้างค่าใช้จ่ายจากเอกสารนี้ to open the same form as in the upload steps above.
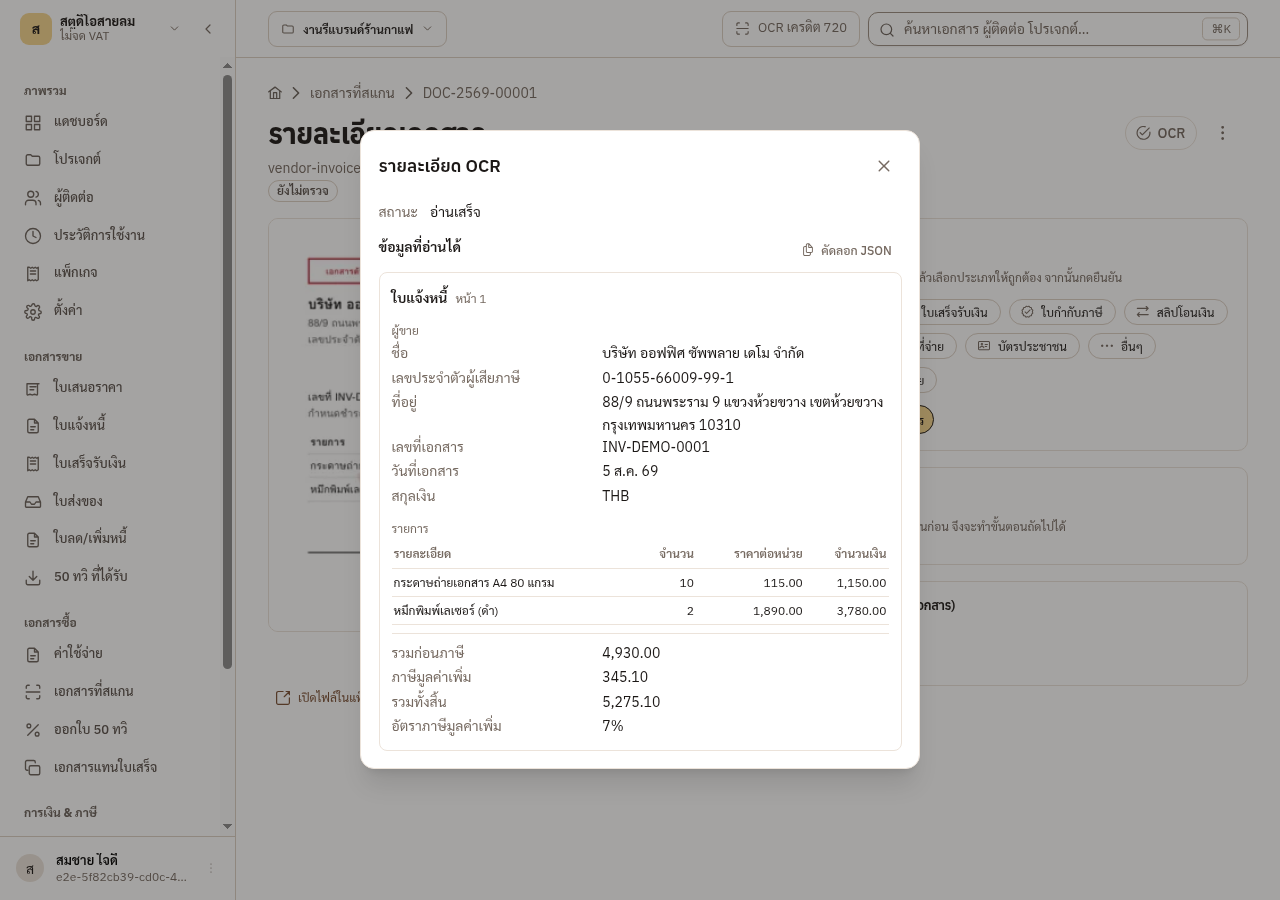
When you press สร้างค่าใช้จ่ายจากเอกสารนี้, if the document was already saved, EZer warns you to save again only if the file holds several bills. If it is already attached to an expense, EZer warns that the amount would be counted twice. When you save, if an expense with the same vendor, document number and amount exists, EZer warns อาจบันทึกซ้ำ. The warning only advises. Press บันทึกต่อไป if it really is a different bill.
7.6 A bill is missing or incomplete
Section titled “7.6 A bill is missing or incomplete”The expense detail page warns when no payment proof is attached. Attach the slip with the แนบเอกสาร button. If the source file is already a receipt, the warning softens, because a receipt is its own proof of payment.
-
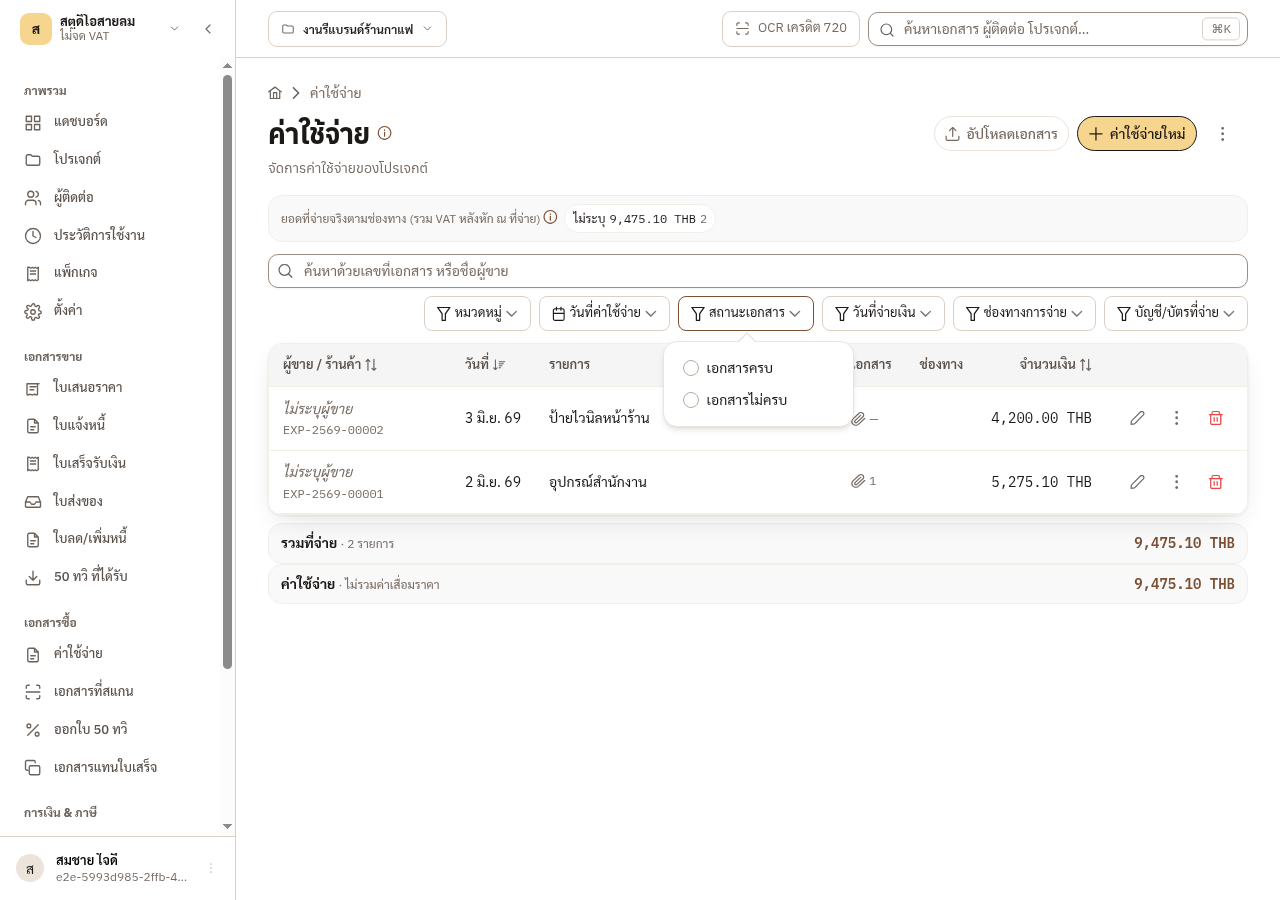
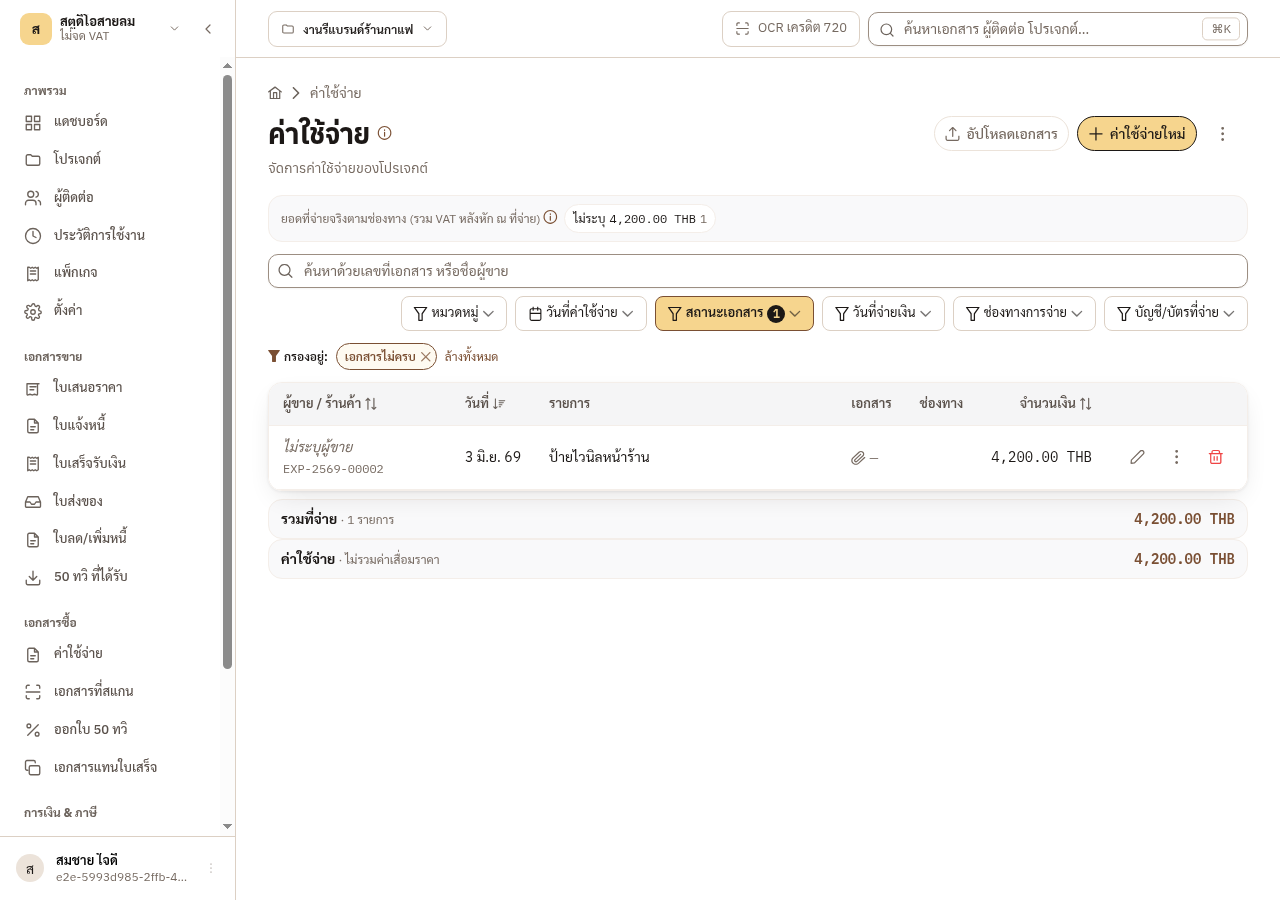
On the expense list, open the สถานะเอกสาร filter and choose เอกสารไม่ครบ.
-
The list shows only the expenses that still have no receipt or tax invoice.
→ You should see: เอกสารครบ means a receipt or a tax invoice is on file. A transfer slip alone does not count.
If the vendor gives no receipt, EZer helps you prepare a payment voucher (ใบสำคัญรับเงิน) or a receipt substitute (ใบแทนใบเสร็จรับเงิน). Use it only when the payment really happened. The 2,000 baht line that EZer warns at is EZer’s own guideline and cites no statute, and it is a warning, not a tax ruling.
7.7 Sent the wrong file or want to change something
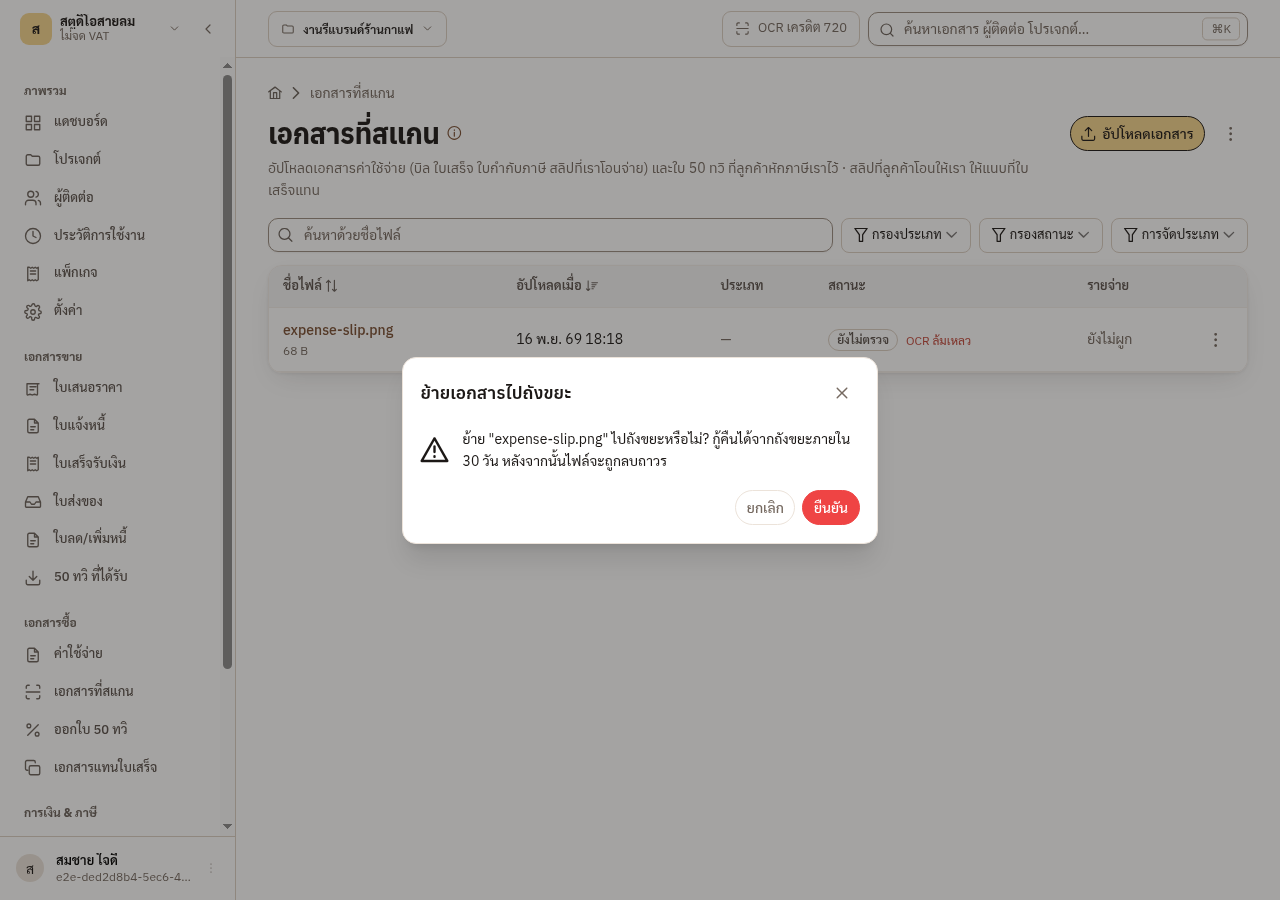
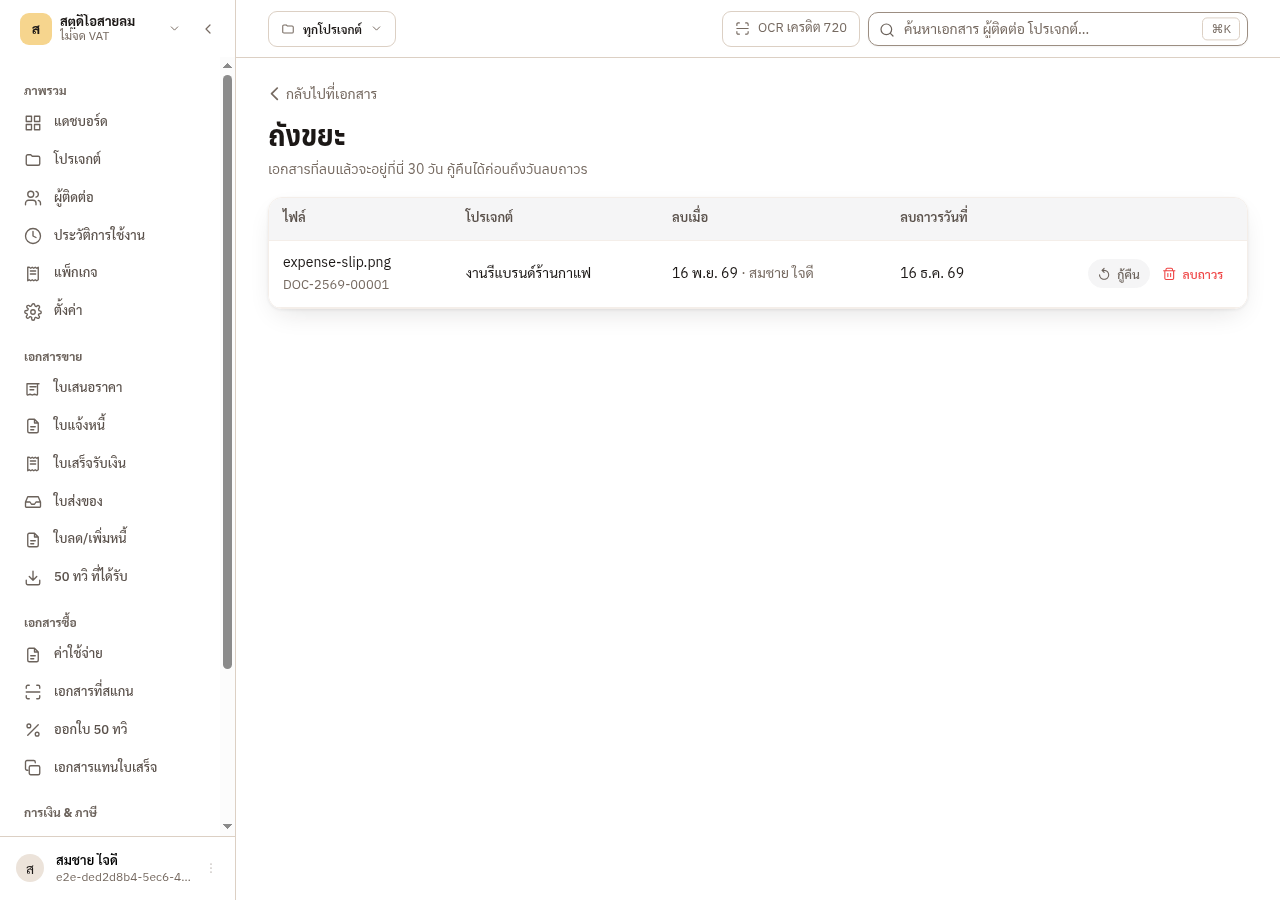
Section titled “7.7 Sent the wrong file or want to change something”Delete a wrong file under the เอกสารที่สแกน menu. A file that is locked, or attached as an expense’s evidence, cannot be deleted until you detach it. It moves to the trash and you can restore it within 30 days. After that it is deleted for good.
-
Delete the file and confirm the move to the trash.
-
See the deleted file in the trash.
-
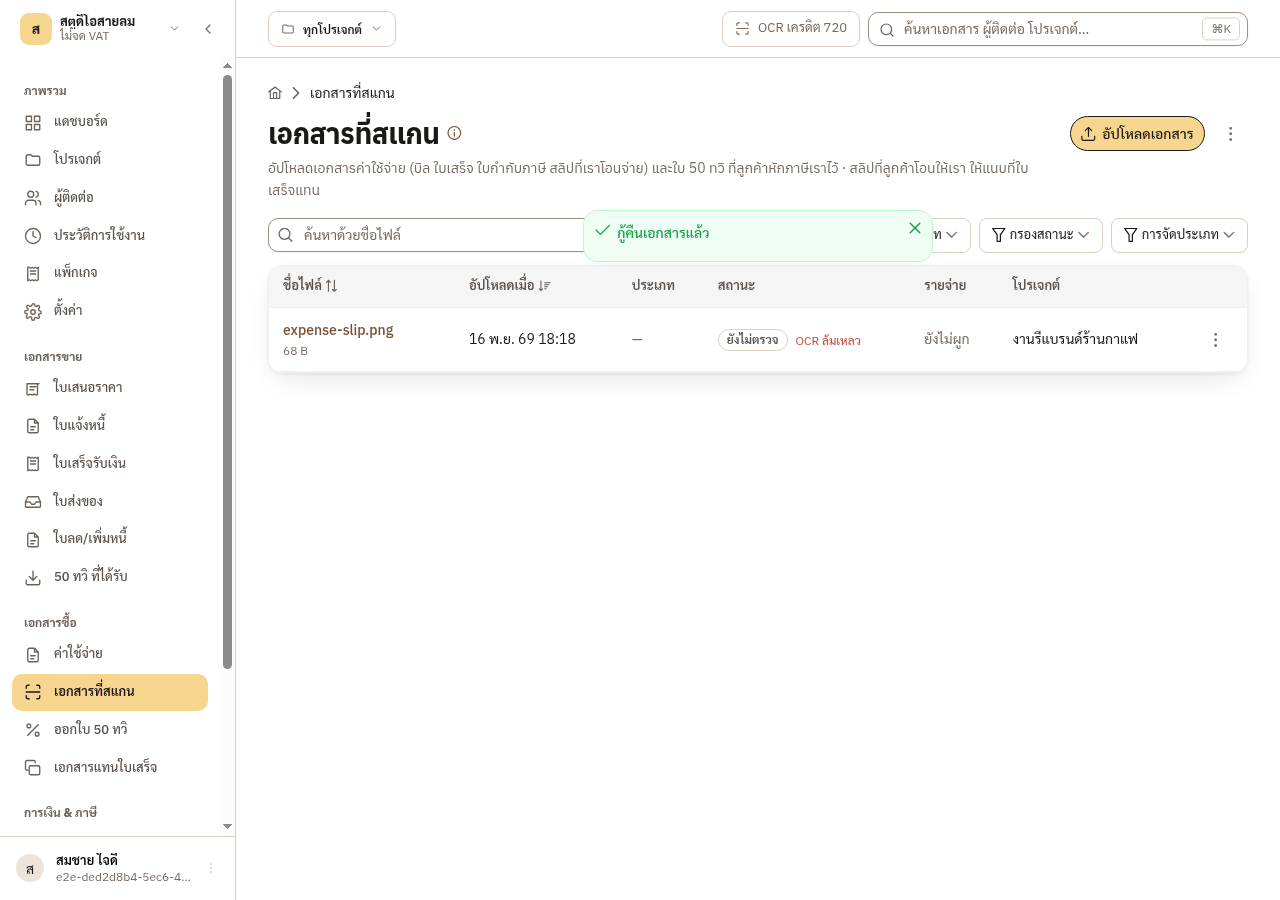
Press กู้คืน. The file returns to the list.