18. Connect your AI assistant to EZer
18.1 How to connect
Section titled “18.1 How to connect”MCP is a standard that lets an AI assistant connect straight to an app. Once connected to your EZer, the assistant can answer questions like “how much did this project spend this month?” or record an expense from a receipt (ใบเสร็จรับเงิน) for you, and you decide what it may do.
The address to connect to (MCP)
https://ezer-backend.hbg-th.com/mcp- In your assistant’s settings, add a custom connector (an MCP server) and paste the address above. Menu names differ from one assistant to another.
- The assistant takes you to sign in to EZer. Use your normal EZer account.
- EZer shows a permission page. Choose which providers the assistant may reach. The summary on the page says what the assistant will be able to do. To change the permissions, press the edit button. Choose only what you need, then press the allow button.
- Go back to the assistant and type what you want help with, in plain words.
EZer’s permission page shows these (the permissions heading appears after you press edit)
- ให้เข้าถึงผู้ให้บริการใดบ้าง?
- แก้ไข
- ให้สิทธิ์ใดบ้าง?
- อนุญาต
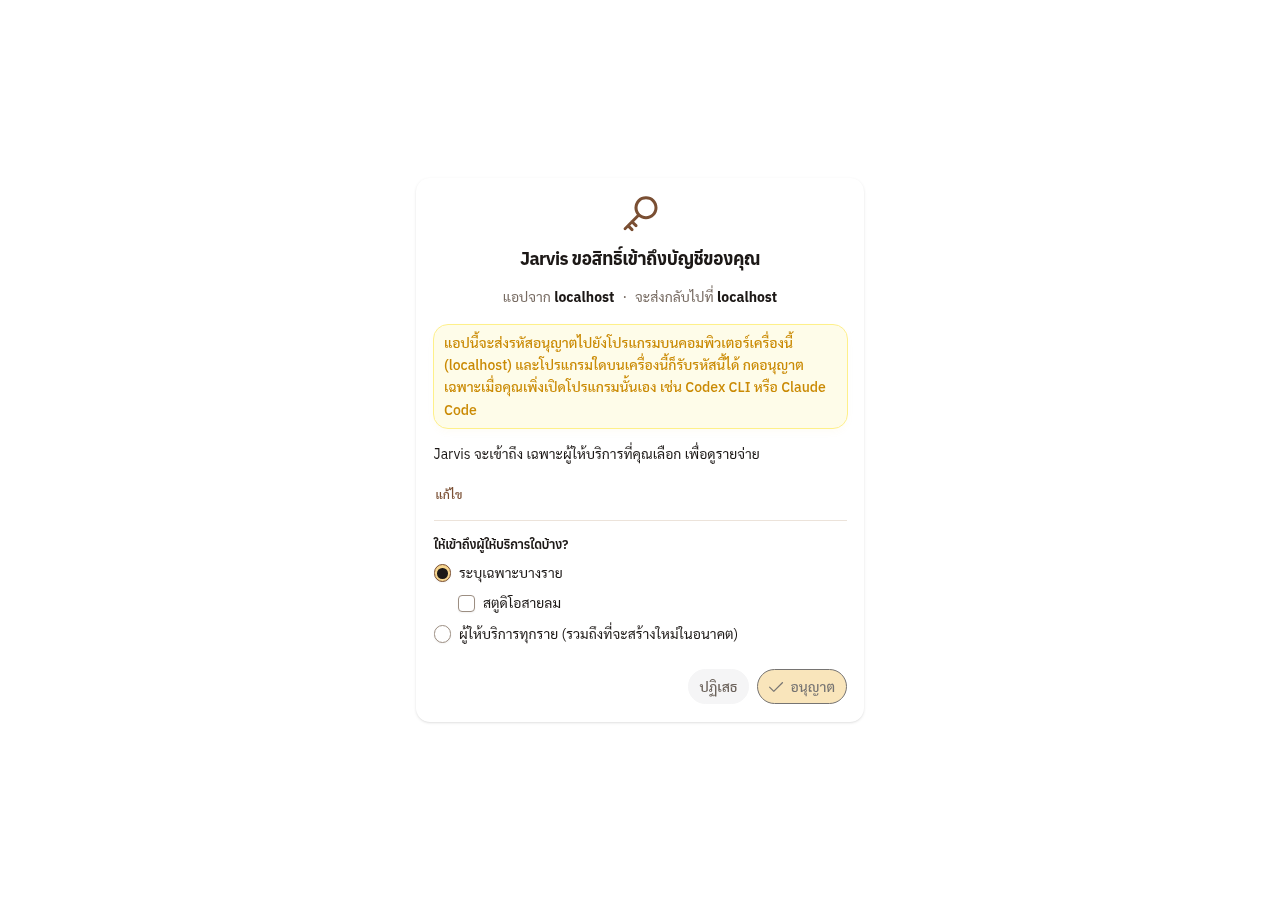
Figure 18-1: EZer’s permission page: choose the providers, then press the allow button. This picture is an example: your assistant’s name appears in its place.
Permissions come in three groups: revenue, expenses and finance data. Revenue and expenses have the levels view, edit, delete and audit. Finance data has view, edit and delete. The view-level permissions are
- ดูรายรับ
- ดูรายจ่าย
- ดูข้อมูลการเงิน
You can withdraw access at any time. Every user can do it at this page and section: press the revoke button on the assistant’s row
- บัญชีของฉัน
- แอปที่ได้รับอนุญาต
- เพิกถอน
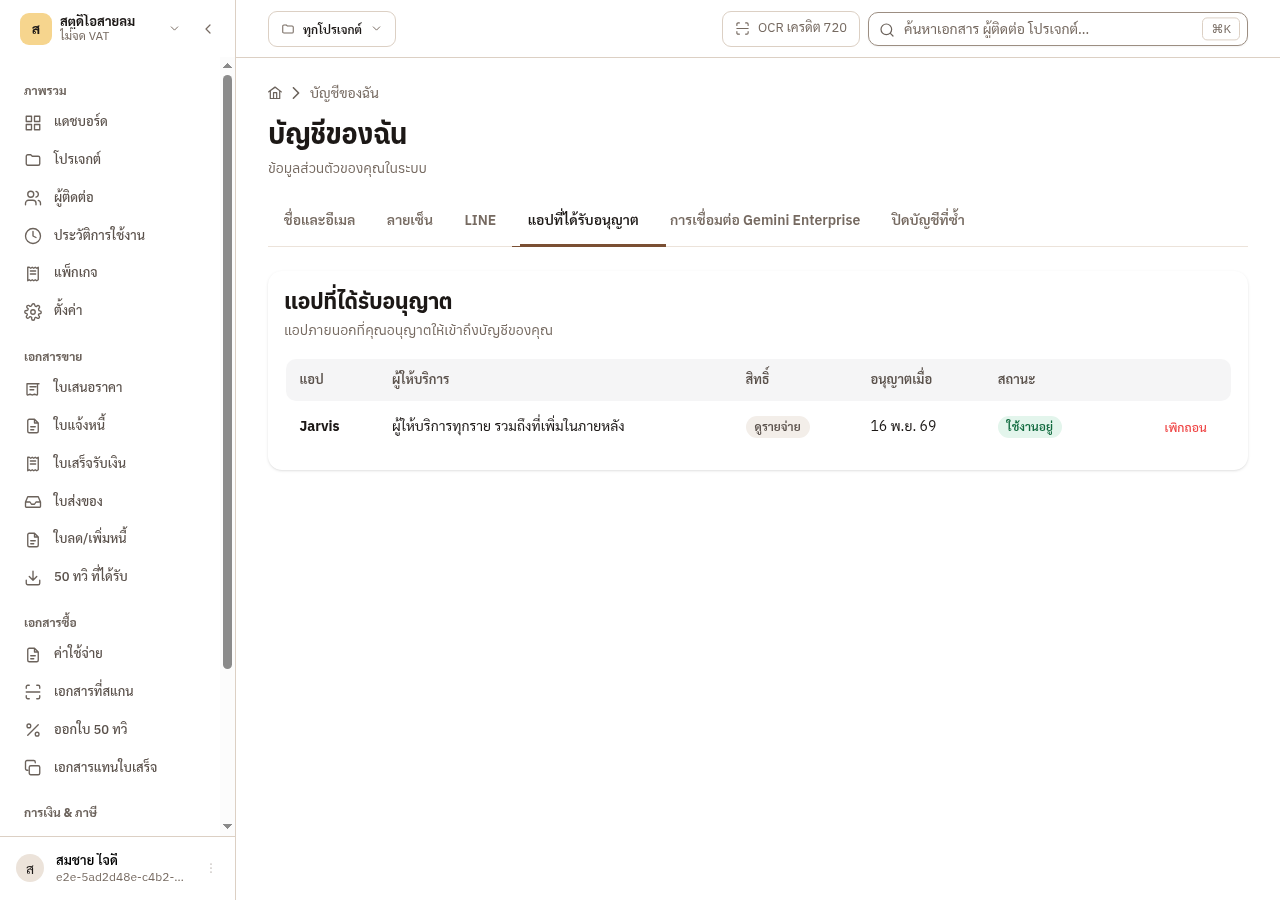
Figure 18-2: The assistants you have allowed are listed in your account, with a revoke button. This picture is an example: your assistant’s name appears in its place.
A provider’s administrators can also see and revoke every member’s assistants, in this page, tab and section of that provider
- ตั้งค่า
- คีย์ API
- แอปที่เชื่อมต่อ
- เพิกถอน
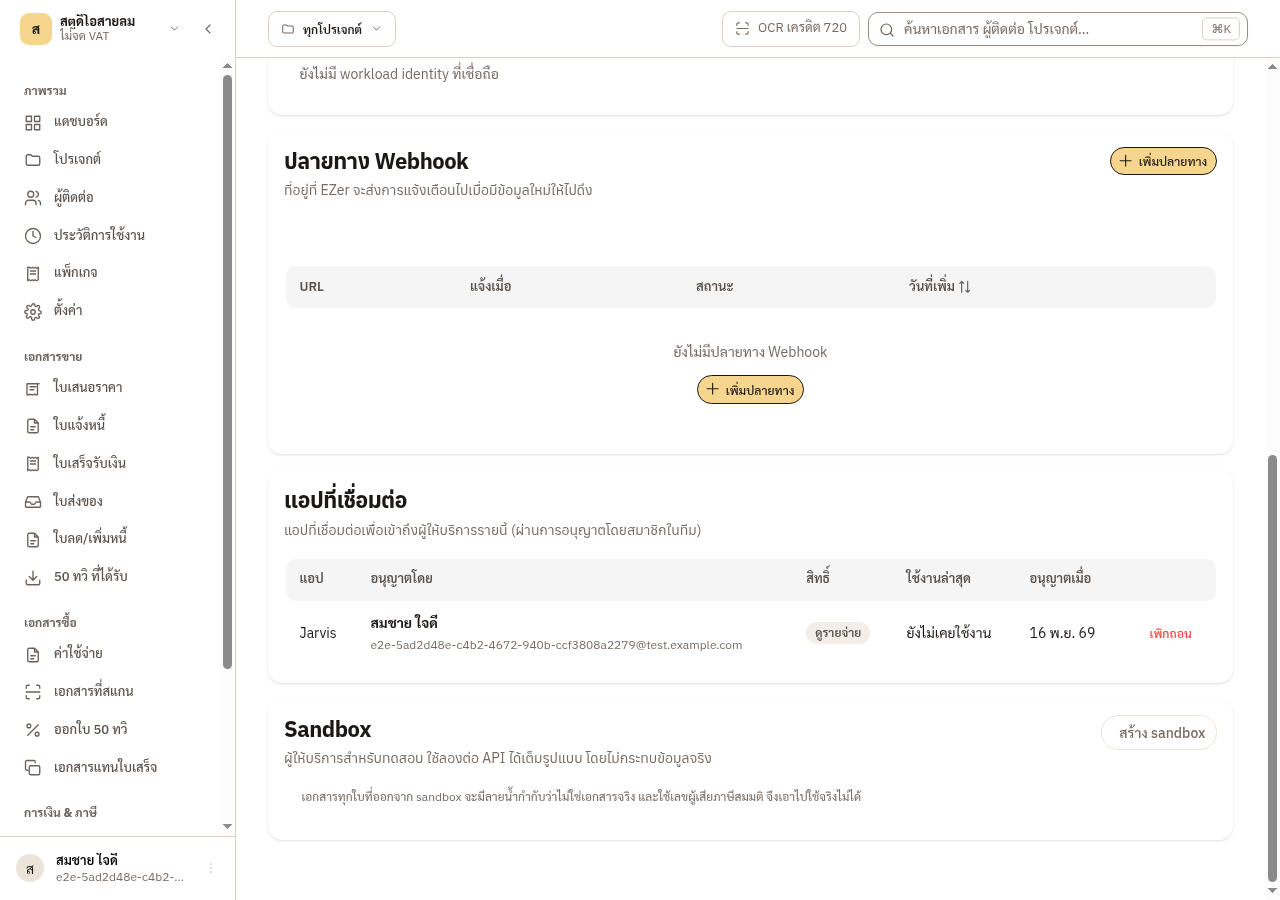
Figure 18-3: The administrator’s view lists every app connected to this provider. This picture is an example.
18.2 Connect Gemini Enterprise
Section titled “18.2 Connect Gemini Enterprise”Gemini Enterprise asks for a client ID and a client secret when an MCP server is added, and only the admin of the Google workspace can add one. So you create a connection in EZer and give the values to that admin.
Create the connection in this page and section
- บัญชีของฉัน
- การเชื่อมต่อ Gemini Enterprise
- สร้างการเชื่อมต่อ
- Give the connection a name, such as the name of the workspace, and create it. Everyone who signs in through it sees this name.
- EZer shows every value the Gemini Enterprise form asks for. Copy the client secret now, because EZer does not show it again.
- Give these values to the workspace admin. The admin adds a custom MCP server in Gemini Enterprise, pastes each value into its field and turns on Enable PKCE Support.
- Each person in the workspace signs in to EZer with their own account and chooses which providers and permissions to grant, as with any other assistant.
The values the admin pastes into Gemini Enterprise
- MCP server URL
- Authorization URL
- Authorization URL parameters
- Token URL
- Client ID
- Client secret
- Scopes